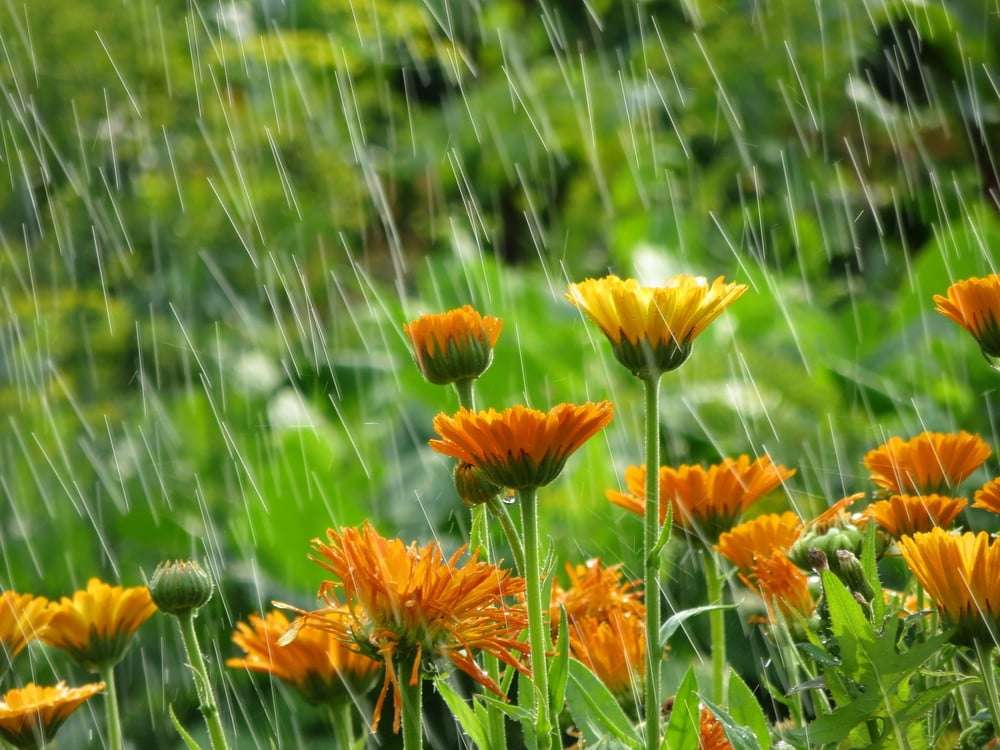
Rain is an essential part of nature’s cycle. Without it, waterways would dry up, disrupting water supplies and destroying ecosystems. However, consider how rain makes it back into rivers and lakes once it lands. What doesn’t flow directly into waterways absorbs through the earth. There, it collects into underground water sources, thus completing the cycle.
What happens, though, when human-made pollution and interference upsets the natural reclamation cycle? As the world continues to urbanize, more impervious surfaces will cover the planet. Paved roads, parking lots, and roofs concentrate rainfall and block natural absorption routes.
When combined with the natural pollution found on the ground of urban areas, that rain becomes stormwater runoff. Full of toxins and debris, the runoff flows down impermeable surfaces until it reaches drains or natural waterways. This often overwhelms drains and deposits pollution directly into the environment.
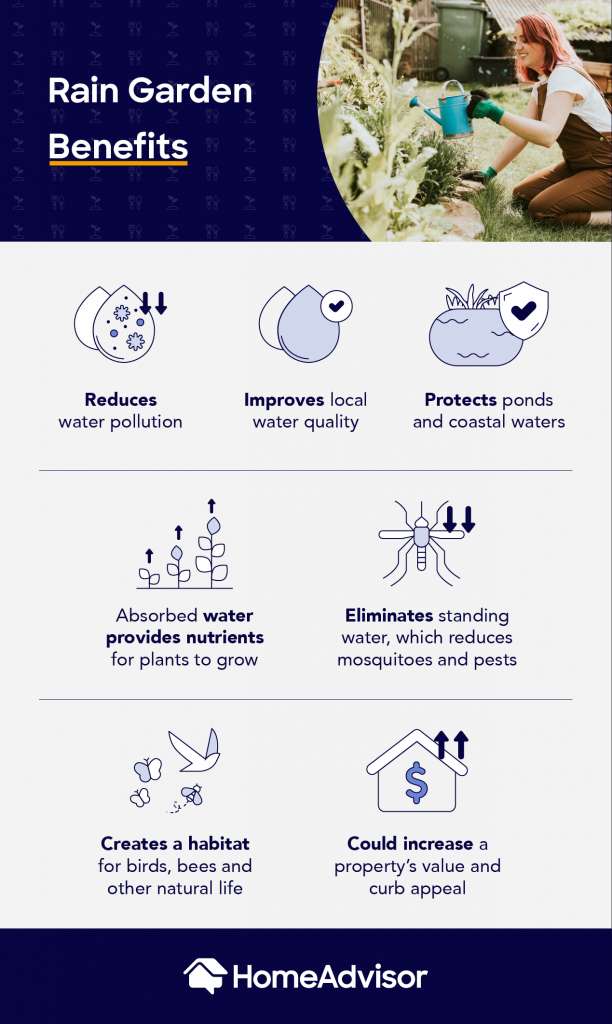
Eliminating the problem of stormwater runoff is a massive undertaking over generations. Right now, however, simple measures make an impactful first step. One of the greatest tools against stormwater runoff is the rain garden.
Designed with native flora and filtering substrates, a rain garden provides enhanced absorption and filtration. This summer, turn that sloping yard or flooded ditch into a beautiful rain garden.
Here are 7 steps for the perfect summer rain garden design:
1. Choose the Location
For maximum performance, the optimum rain garden location is in the path of runoff. Sloped areas of a yard are often optimal places. Depending on how many impervious surfaces are on your property, though, the best placement depends on the home’s specifics.
Roofs and driveways count as impervious surfaces. A rain garden within 30 feet of the downspout or driveway will collect and absorb runoff. Always keep rain gardens at least 10 feet from the house to avoid saturating the foundation. Also, consider low-lying areas that frequently flood. A rain garden will help eliminate standing water.
If your neighborhood allows it, consider a community rain garden. Reduce stormwater damage while bringing the community closer together. Be sure to follow all appropriate local laws and ordinances. With the proper care, a community rain garden often becomes a local jewel of natural splendor.
2. Determine the Optimum Garden Size
Rain gardens of any size will work if appropriately constructed. Larger properties can use several rain gardens to control multiple runoff or flood areas. For optimal digging, however, shoot for a garden of 100 to 300 square feet.
Many factors influence garden size. These include:
- Amount of impervious surfaces on the property (more surfaces means a larger garden).
- Topography of the land, especially slopes.
- Soil composition and absorption rate.
For rain gardens designed to catch roof runoff, use some math to determine the ideal size. Multiply the percentage of water you want to drain by the square foot area of your roof. Adjust those numbers based on your available land and resources.
The depth of the garden depends on the slope of the land. Gardens on slopes greater than 5% require a depth of 6 to 8 inches. Slopes of 4% or less need just 3 to 5 inches of depth. Additionally, the ground itself influences the optimal size for your situation.
3. Verify the Soil Composition

Soil is not one material; it is a mixture of many soil types, including sand and clay. How fast water absorbs into the ground depends on the ratios of these materials.
An easy way to check the soil is with a simple test. Take a sample of dirt from the chosen location. Add a few drops of water to the sample and roll it between your hands. The soil is high in sand if it is gritty and crumbles immediately. If it retains its shape, it is high in clay.
Sandy soils are ideal for rain gardens. However, even high-clay soils support thriving rain gardens. High-clay contents require larger gardens to ensure speedy draining. Add sand or other soil amendments to the soil to improve permeability.
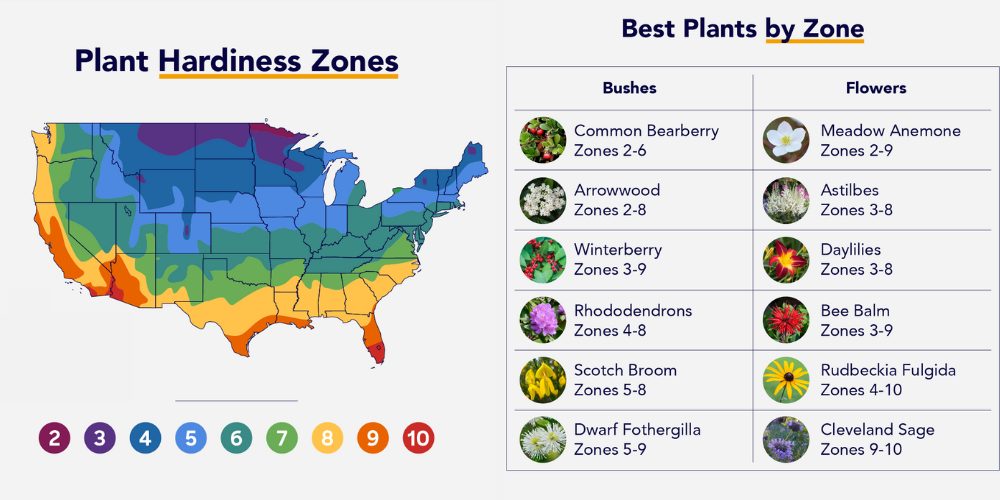
4. Select Native Plants
Once you’ve determined where to dig, decide what to plant. A rain garden’s function is to absorb and filter water, but it also provides a thriving ecosystem for local animals and insects. Because of this, use native plants known for their rain garden potential.
Native plants have several advantages over other choices. For example:
- They are resistant to native pests and diseases.
- They thrive in local conditions, including rainfall and weather patterns.
- They match the hardiness levels of the surrounding climate.
- They require less maintenance once established and thriving.
Native plants also create excellent conditions for the local fauna. With humans constantly encroaching on natural habitats, even the smallest sanctuaries matter. This wildlife-friendly garden provides boons to the environment in many ways, and it is all made possible by using native plants.
5. Gather the Tools and Supplies
Rain garden design does not require any fancy tools. Still, you will need:
- Shovels and rakes for digging and manipulating the soil.
- A tape measure and level to ensure the proper grade.
- Stakes and strings to create a level garden on a sloped surface.
In addition, collect your chosen plants and any needed soil amendments. You also need enough bags of topsoil to fill in the excavated garden. Finally, gather mulch and various sizes of crushed or whole stones. These help prevent erosion while boosting the garden’s filtering powers. Once you have all the needed tools and supplies, you’re ready to dig.
6. Get to Work
To start, begin in the center of the garden area. Dig down to the required depth based on your calculations. Use the excavated soil to create a berm around the garden perimeter. In other words, use the center dirt to build a wall 8 inches above ground level.
Since slopes are common placement sites, one side of the berm will be taller than the other. This is done on purpose to keep the garden level.
Pack the berm soil tight to prevent erosion. Cover the berm with gravel or mulch for further protection. Next, backfill the garden with a layer of gravel and crushed stones. Follow this with the topsoil mixed with any needed amendments. If you compost on your property, it makes a great amendment to promote the initial stages of the garden.
When planting, vegetation with high-absorption properties go in the garden’s center. Often, these are drought-resistant shrubs and grasses. Fill the rest of the garden with other native plants known for strong roots. This will help prevent the soil from eroding as it collects water.
7. Provide Low-Effort Maintenance
For the first two years, regularly weed and water the garden. Cover the soil with mulch to prevent weeds. Aim for at least an inch of water each week to build a robust root system. Prune the garden to ensure proper sun and shade as needed. Regularly remove dead branches and leaves to avoid the spread of diseases.
After two years, the garden is self-sustaining. The native plants will outcompete weeds, and the established roots will allow it to thrive on the natural water cycle.
Final Thoughts
A rain garden is an excellent tool to combat stormwater runoff and standing water. Not only are they great additions to any environment, they also provide stunning curb appeal. Any property benefits from a rain garden, but those with extra impervious surfaces or water-collecting low points will find added benefits.
Start planning your rain garden design today. The environment thanks you.

About the Author
Meet Bridgett, your friendly neighborhood green building guru! With more years of experience than she’d like to admit, Bridgett is your go-to expert for all things eco-friendly construction. She’s on a mission to make your home the envy of every tree hugger in town (and maybe even the squirrels 🐿️). Let’s build a greener, funnier, and all-around better world together – one enlightened eco-conscious choice at a time!