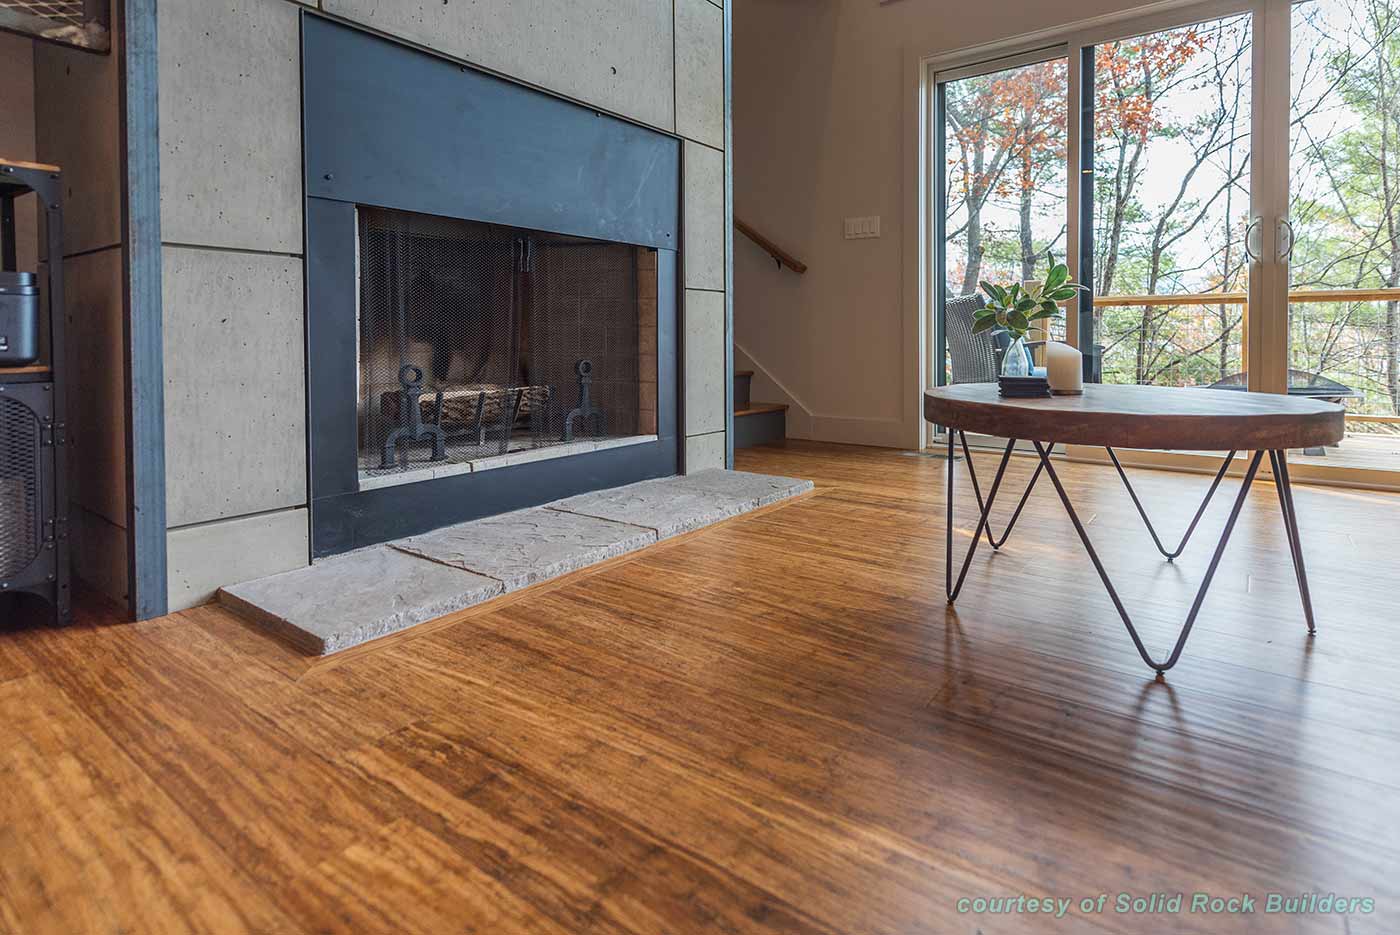
It’s that time of year when pumpkin spice is everywhere you look. That means it’s not just time to enjoy your favorite flavored latte or an Oktoberfest beer: it’s also time to start thinking about hardwood floors. You might be asking, “Can’t I just curl up in my favorite sweater and enjoy my beverage?” Sure you can! While you do consider this – Winter is around the corner, and that means it’s the prime time to install new hardwood floors or make plans for protecting your existing wood floors.
One of the most common complications with hardwood floors is known as “cupping.” This happens when the flooring absorbs excessive moisture on the underside and causes expansion with the edges raised. Due to the low humidity, it is unlikely to see hardwood floors cupping in the winter. Many builders will recommend installing hardwood floors in the winter because of this low humidity.
Without careful consideration, cupping can become a serious problem when the seasons turn over. Rather than complicate your spring cleaning, it’s important to regulate moisture exposure for these floors.
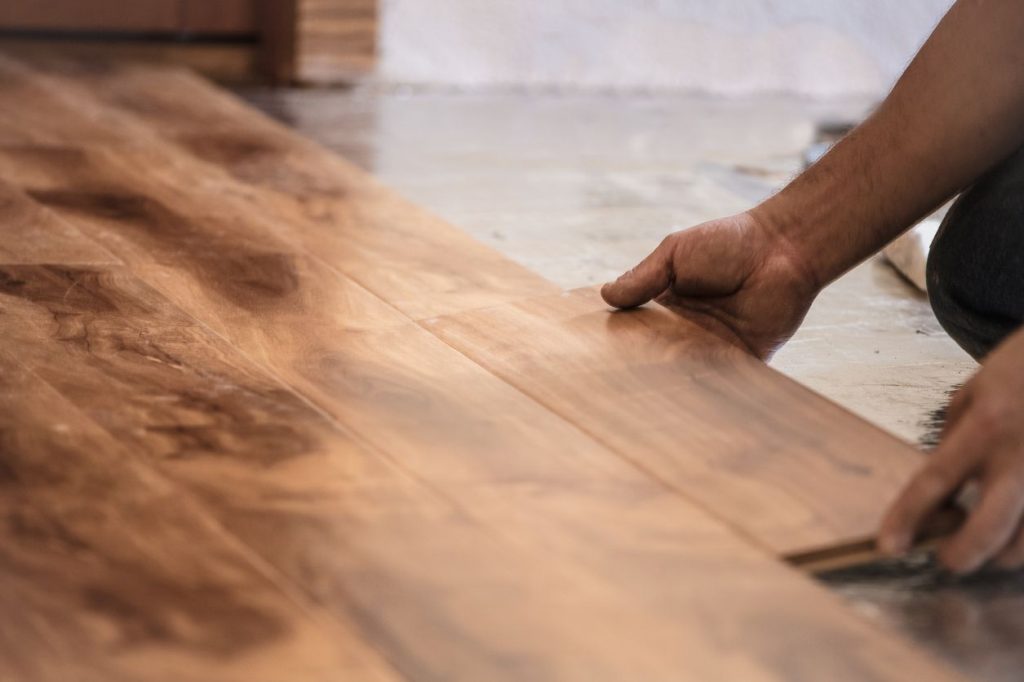
Hardwood Floor Installation Season
Just as tulips and tomatoes have a season, hardwood floor installations will result in different plank movements from season to season. Some of the same factors that drive crop seasons drive wood floor installation conditions too.
Winter can be a great time to roll out new floors, but it can complicate the process due to irregular moisture. Many of us understand winter to be the “dry season.” Low humidity can correspond with shrinkage of wood planks – leaving larger expansion gaps than usual. If you already have wood floors, then you have probably noticed this trend already. It’s the entire reason why expansion gaps are left during installation!
Wood is a hygroscopic material. That’s a fancy way of saying it has the ability to absorb moisture from the environment around it. Pretty neat superpower, huh? If humans could pull that trick off, we’d never have wrinkled skin.
When moisture fluctuations are not properly accounted for, however, the results can be disastrous. The more humid the environment, the more moisture the wood absorbs and the more the wood expands and the larger it gets. As the wood gets larger, the spaces between the planks get smaller. Installing wood floors in a dry season requires extra attention for expansion gaps because the planks will expand throughout more humid months.
Improper expansion gap measurements is often a cause of cupping. Rather than having a leaky water line, you may have just miscalculated how much space to leave. When the hardwood planks expand outside of the winter months, they will push up against each other because of the inadequate space to expand.
This is not a cautionary tale about installing hardwood floors in winter. It is a great idea to install when the boards are easier to acclimate – more on that later. The risk of hardwood floors cupping in winter is low. This conversation is more about how forethought can prevent problems down the road. It is much easier to account for hardwood cupping in the winter than to repair or replace the floors in the summer.

To illustrate this principle, we can delve into a more specific example. In the Midwest and Eastern US, you could install wood in the summer when humidity is high. Come fall and winter – when the humidity drops – you’ll notice gaps between the boards, but fret not. Gaps in hardwood floors during the winter is the nature of the beast with hardwood flooring: it is perfectly normal.
In those same areas, install hardwood floors in the fall and winter when humidity levels are low. Come spring and summer, your wood floors may expand slightly, but you may not even notice. Then, season after season, you may notice your floor planks separating slightly when the low humidity season arrives and closing back up when humidity peaks. These changes tend to take place over a period of 2-5 days, depending on the severity of the shift.
What is Humidity and Why Is It Relative?
To protect your wood floors against changes in size, it’s smart to keep an eye on the house’s humidity levels. When you hear the talking head on TV give the weather report, they always give you the relative humidity.
Okay… so humidity relative to what?

Relative humidity (RF) is the ratio of the moisture in the air compared to the amount of moisture that the air can hold at a given temperature. In other words, the moisture is relative to the air temperature.
As our friend Mike Morrison over at WFXL in Georgia illustrates, you can have the same moisture amount in the air. Still, as the temperature changes, the relative humidity levels change too. So, at 50°F, a given amount of water maybe 100% RH but that same amount of moisture is only 28% RH when the temperature rises to 86°. The relative humidity is just as important for your wood floors’ comfort inside the home as it is for your own comfort outside the house.
Acclimating Bamboo Hardwood Floors Before Installation
The prefinished wood and bamboo flooring that arrives at your house for installation are most likely kiln dried. That means it’s probably got anywhere from a 6% to 12% moisture content. It’s literally like a sponge just waiting to soak up (and release back) moisture from the environment.
It’s important to let the wood get accustomed to the environment to spend the rest of its usable life before installing it. This process is called acclimating wood flooring.
When you let the wood sit for 3-5 days (or more as is necessary for humid or dry climates) in the room where it will be installed, it will absorb moisture from the air in the room and adjust the shape to its “new normal” size, matching its environment.
If you install hardwood floors when humidity is moderate to low, you will probably notice less gapping later. Install in a season when the humidity is high, and there’s a chance that comes a dry season, you’ll get more noticeable gaps in between your planks. As seasons come and go and humidity goes up and down, those gaps will open and close up; this is common with hardwood flooring. And the bigger the plank, the more wood fiber available to react to moisture, and the larger the gaps will get between the planks. That’s why you see pretty huge gaps in old houses that have extensive plank floors.
As we’ve mentioned, this can be a double edged sword. Installing in months with low humidity can give you an accurate perspective of what your planks will look at their smallest. Winter installations that fail to account for hardwood floor cupping can be a bigger problem than unexpected space between planks in the summer.
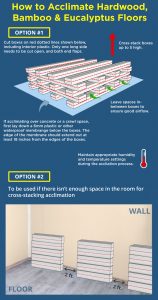
Guidelines for Acclimating Wood, Bamboo, and Eucalyptus Floors
- Always acclimate flooring in the room in which it will be installed with the appropriate climate control device.
- Make sure boxes are open, and any interior plastic wrapping is open too. Open both flap ends and at least one long end of the box, so the flooring is exposed to the room’s environment.
- You can stack boxes up to 5 high without warping, but be sure to cross-stack them.
- Don’t stack your boxes on bare concrete or carpet that’s covering concrete. The wood may absorb excess moisture from the concrete.
- Acclimate for a minimum of 72 hours. If you are in a very humid or arid environment (Florida and Nevada: We’re talking to you!), you may want to wait up to 10 days.
Maintaining Hardwood Floors and Indoor Humidity
Lucky for you and your hardwood floors, they like humidity in the same range as you do. So, aim to keep your indoor relative humidity at healthy levels for you, and your wood floors will be healthy too.
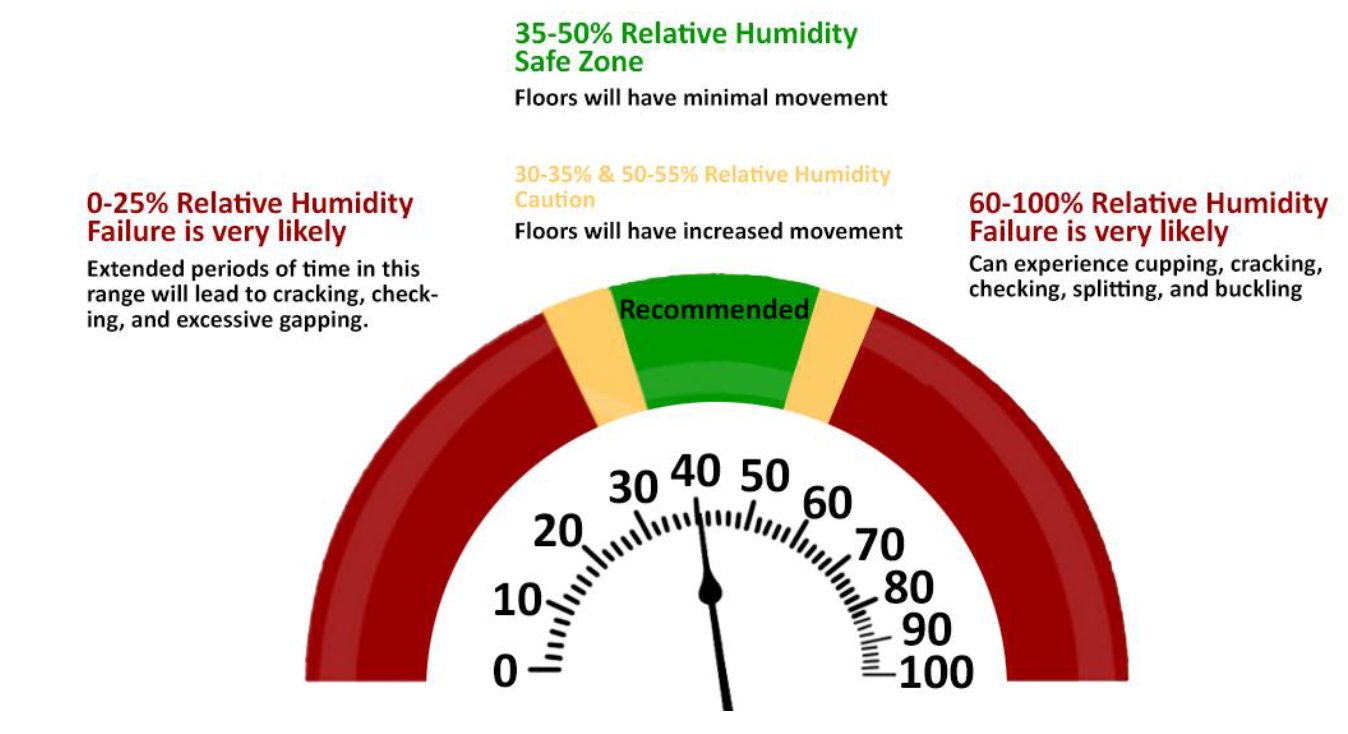
The safe zone for your wood floors is 35% – 55% relative humidity, and luckily the human body tends to prefer that as its comfort zone too. When you keep the indoor humidity levels comfortable for your family, you’ll keep the indoor humidity levels comfortable for your hardwood and bamboo floors as well. But come the dry season, keeping both the relative humidity inside in a range that’s good for you and your floors can be a challenge. Get it wrong, and your hardwood floors might experience cupping when winter rolls over.
Low Humidity Blues
Once the temperatures drop in Winter in the Eastern and Midwest US, we turn those furnaces, fireplaces, and other heat sources on. The heat that keeps us toasty also dries the air out. Ignore the dry air, and your body and hardwood floors will be singing the low humidity blues.
That dry air isn’t good for your nasal passages, sinuses, and the rest of your upper respiratory system. When the mucous membranes get dry and irritated, you get uncomfortable. And even worse, your mucous membranes don’t work as they should. According to Dr. Maynak Shukla with The Asthma and Sleep Institute, dry mucous membranes can cause nose bleeds and increase your risk of catching a cold, influenza, or other diseases.
Dry air isn’t good for your wood floors either. The wood fibers in your floors dry out just like your mucous membranes. Your wood flooring won’t bleed or catch the flu, but that doesn’t mean it won’t be weakened or damaged permanently. Damage like cracking, permanent shrinkage, and splintering is nothing to sneeze at.
You can prevent this damage to your mucous membranes and your wood floors by adding humidity to the air with humidifiers.
Adding Moisture with Humidifiers
Humidifiers add moisture to the air, making it more comfortable for people, pets, and wood floors. Your humidifier should keep the relative humidity at that sweet spot between 35% and 55%. Realistically, you want it on the lower end than the upper end. Keeping the humidity level at the 55% range takes more energy and uses more water. It decreases overall indoor air quality by promoting the health of your dust mite population.
Warm Mist and Cool Mist Humidifiers
So, you want moisture in the air, how are you doing to get it there? Humidifiers use a couple of different approaches to the problem.
Warm mist humidifiers
These are probably the type of machine that comes to mind first when you think of humidifiers. If you ever had a humidifier in your room as a kid (especially when you were sick), this is probably what Mom used. This is the oldest technology, and it just heats water to convert it from the liquid into gas or vapor. The vapor then escapes the unit into the room. It’s the most rudimentary way to add moisture.
Pros: Quiet – usually doesn’t use a fan; hot water doesn’t promote as much bacterial growth.
Cons: Poses a danger of scalding; it may not be energy efficient.
Cool mist humidifiers
On the other hand, cool mist humidifiers don’t heat water to the steaming point. They either use evaporative technology or ultrasonic technology to get the water out of the machine and into the air.
Evaporative cool mist humidifiers work just like swamp coolers. They employ a wick that absorbs moisture and a fan that blows across the wick to create a vapor, and then they push the vapor into the air in the room. The vapor that leaves the machine is cool (that’s why they call them cool mist) and won’t scald or burn.
Ultrasonic humidifiers are the only models that don’t convert water from liquid to gas. Instead, they rapidly vibrate a plate using sound at the frequency you can’t hear. These vibrations convert the water into extremely fine droplets. Then a fan disperses these minute water particles into the air in the room. There’s no heat involved, so the moisture is cool. This is the latest in humidifier technology, and instead of creating vapor, it produces miniature droplets into the air.
Pros: Both types of cool mist humidifiers are safer around children and pets because they aren’t hot.
Cons: Ultrasonic humidifiers can create puddles, and evaporative models have wicks that must be frequently changed.
If your goal is to maintain stable humidity for your floors, than puddles can be antithetical to your goal. Standing water is a concern year-round: it extends beyond the concerns of hardwood floors cupping in the winter. Standing water can damage the finish and even leave dark discolorations on the planks.
This is not a suggestion to entirely disregard these types of humidifiers. Many alternative wood floors – bamboo, eucalyptus, etc. – are warranted for some level of water-resistance. Be sure to check with your manufacturer before purchasing any appliance with a leak risk. Some floors may be able to resist minor drippings overnight. As a rule of thumb, however, it is important to clean up spills and puddles as soon as you see them.
By the Room or By the House
In addition to deciding what type of humidifier to use, you need to decide if you want several individual units or an entire house humidifier. No matter what route you decide to go, it’s important that the unit include a humidistat. Just as a thermostat lets you set temperature, a humidistat lets you set a humidity level. Because you know – control.
Single Room Humidifiers
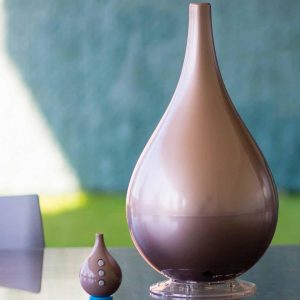
This is the Object. How cool is this cool mist humidifier? Shaped like the droplets it seeks to regulate, it’s a sleek touch for modern homes. It even has a little matching remote control, so you don’t have to walk across the room to adjust the settings.
Compared to its contemporaries, the Object is certainly the petite model. It’s geared for a room up to 450 square feet. Billed as a single-room humidifier, it does exactly that. If you are only worried about stabilizing floors in one room, then this is your go to! It will be affordable and convenient – just don’t expect it to do more than you bargained for.
Multi-Room Humidifiers
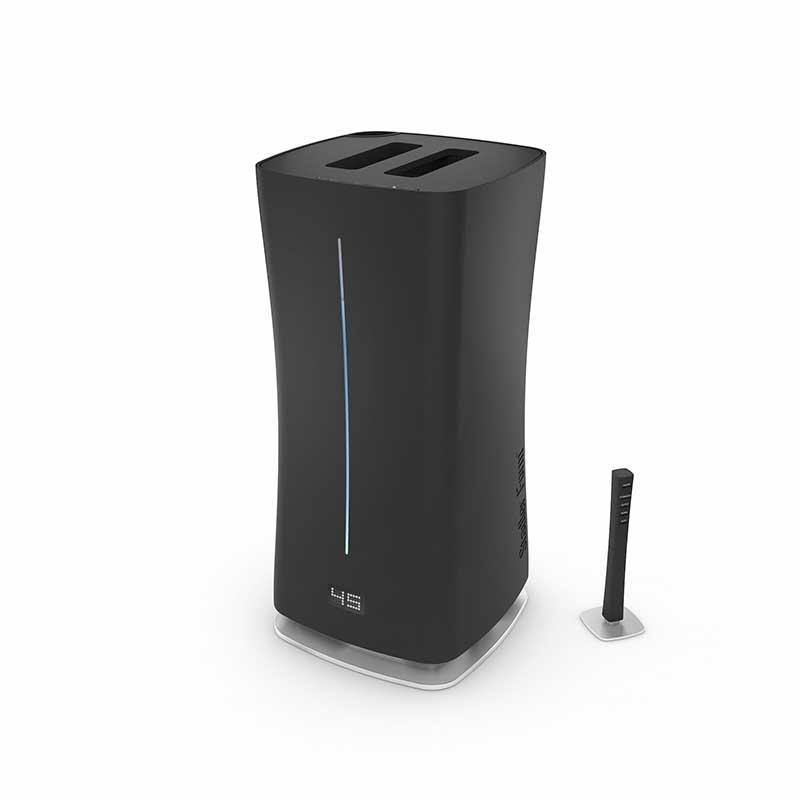
The Eva ultrasonic humidifier by Stadler Form puts you in complete control. Unlike most ultrasonic humidifiers, you can set this one safely on the floor. With the ability to push out over 3 gallons of water per day, Eva also gives you the option to add essential oils for aromatherapy and hydrotherapy combination. Because it can treat the air over 860 square feet, one unit can handle multiple rooms as long as there is airflow. That means it doesn’t work through closed doors. There’s an option to preheat the moisture before it is expelled so the unit won’t cool a room you are trying to warm. That’s a little-discussed side effect of cool mist style humidifiers. Everything Stadler Form makes is a work of art. Check out this one that’s made for a single room.
Whole House Humidifiers
But let’s say you are more of a one and done type of person. Well, unless you and your wood floors are going to stay in one room all Winter, you need to invest in a whole-house humidifier that installs on your furnace.
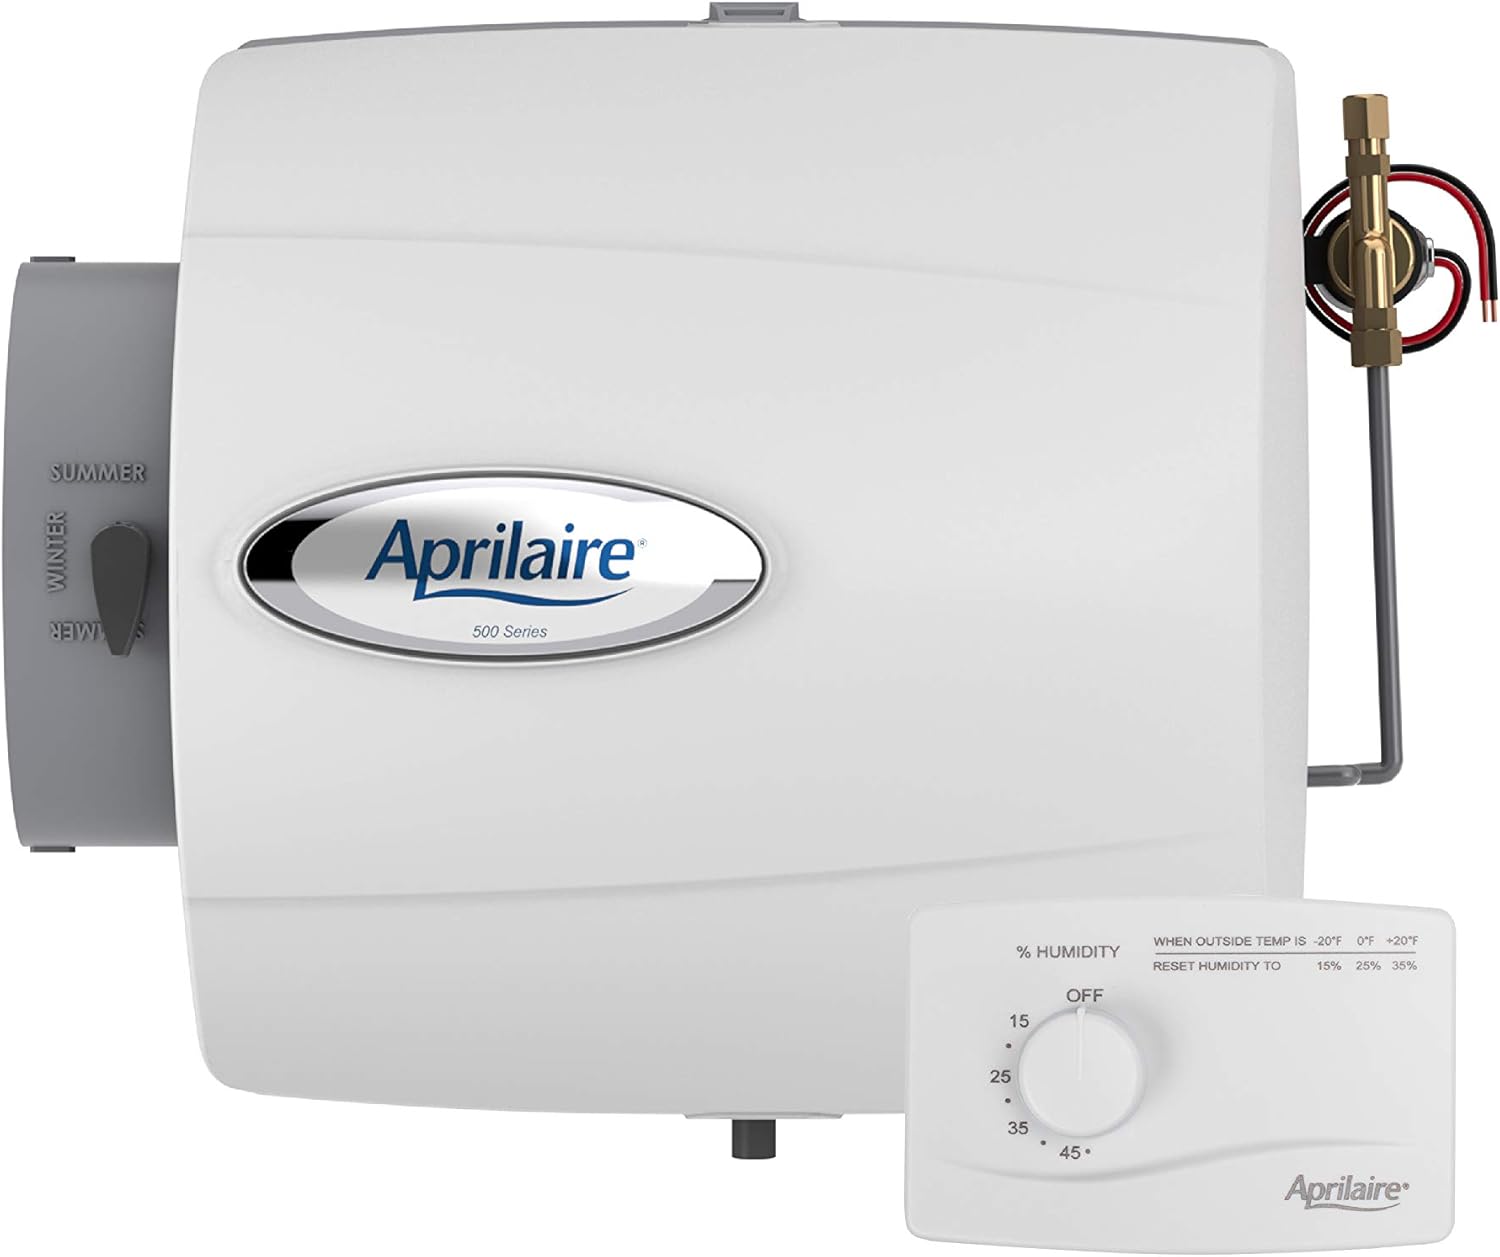
Aprilaire is really the leader in whole-house humidification. They invented the whole house evaporative humidifier (remember that’s cool mist) technology way back in 1954. It’s only gotten better and smaller since then. The 500M is a compact system that will treat a house up to 3,000 square feet with 12 gallons of water a day. If you’ve got more houses, they’ve got larger units. The evaporative wick sits in a tray, and water flows by gravity to the evaporative panel. Warm air from the furnace is forced through the evaporator panel and then dispersed is via your furnace’s duct system. The unit itself is relatively inexpensive, but if you aren’t comfortable with plumbing or electrical, you’ll want to pay someone to handle the install for you.
Humidifier Maintenance
No matter what kind of technology you use to add moisture to the air, there will be some maintenance costs.
For warm-mist humidifiers, you must clean the units every few days to keep slime at bay.
Cool mist evaporative humidifiers (whole house or room) have wicks that must be replaced regularly. Wet wicks eventually fall apart and can harbor microbial growth, so depending on how much you use your humidifiers, these may need to be changed once a month or more often.
Many evaporative and ultrasonic humidifiers have either filters or demineralization cartridges that must be changed during the season.
No matter what type of humidifier you use, you need to keep the water reservoir clean, so plan on washing it each time you refill the unit.
Adding Humidity is Good; Particulates and Bacteria Not So Much
So now you know why humidity is healthy for you and your wood floors, and you’ve got some ideas about how to get moisture in the air, let’s look at the downside to that extra moisture.
Water from your tap has calcium (Ca2+) and magnesium (Ma2+). If you have a softener in your house, these minerals are replaced with sodium through the magical process of cation exchange.
When the softener resin gets coated with all that calcium and magnesium, you backwash it with some more saltwater. What does this have to do with humidifiers?
Scale and particulates
See, whether you take those minerals out or not, you’re still dealing with particles in the water. So, if you run soft water through your humidifiers, you’re adding salt particles into the air. If you run hard water through your humidifiers, you are adding calcium and magnesium to the air.
Either way, you are creating what humidifier manufacturers refer to as “white dust.” Some companies like Stadler Form use demineralization cartridges to neutralize the minerals, while others recommend that you only use distilled or water purified with reverse osmosis and deionization. Why those two processes? They are the only ones that will remove all minerals from the water.
Bacteria and mold
As mentioned under the maintenance section, you’ve got to keep humidifiers scrupulously clean. That water is a breeding ground for mold and bacteria. You certainly don’t want to be adding that to the air you will breathe. You or your cat could end up like this:
Vicks makes a warm mist humidifier with an ultraviolet bulb that sterilizes the water after 2 hours of use. Even if you have a UV light, you need to keep the water reservoir clean to keep mold and bacteria at bay.
Protecting Wood Floors from Salt and Water
There’s more to winter care for your wood floors than just watching the humidity. Being cognizant about moisture is a good way to prevent hardwood floors from cupping in the winter, but there are other concerning damages. Bumps, scrapes, and dents can be just as bad as water damage – but they can be easier to avoid! The following advice is so common sense and low tech; you don’t need fancy technology. You need a few reminders to start looking down.
Remember your feet. Set aside a space for boots and shoes by the door. Then use it! The salt you track in from streets, walkways, and driveways will ruin wood floors.

Ebern Designs’ cabinet opens to four shelves with plenty of space to store an entire family’s boots. Make it easy for people to take their shoes off when they enter the house, and they will.
Rugs inside and outside of every entryway help control winter’s mess too. If your entryway is wood, remember to use rugs with natural rubber backing. This backing won’t mar your floors the way jute or coconut coir are wont to do.
Keep towels or rags by the entryway to quickly mop up any snowmelt or salt that may get tracked inside. The faster you wipe up, the less time these gremlins have to mar your finish.
Are Your Floors Winter Ready?
So, now you know. If you’ve been thinking about installing wood floors, winter is a great time to do it.
And if you’re already enjoying the timeless beauty of wood and bamboo flooring, now is the time to:
- Decide how you will handle the need for humidity.
- Pull out any humidifiers you may already have, clean them up, and install new filters and cartridges.
- Shop for shoe and boot cabinets or racks to place in foyers and mudrooms, along with towels for drips and drops.
- Pick rugs with natural rubber backing for every entryway.


About the Author
Cheryl is our go-to guru for all things sustainable living. She’s on a mission to make your family and our planet thrive! With a heart as big as her passion for sustainability, Cheryl brings you the freshest insights on eco-friendly building products and energy efficiency. 🌱💡
And hey, did you hear about the eco-friendly lightbulb that went to therapy? It finally found its inner “enlightenment”! 😄 Join Cheryl on this green journey, where she’ll tackle your concerns with a smile and a sprinkle of eco-humor!
