The heat is on and it’s time for cool DIY kitchen remodeling projects that won’t break the bank – or your back. Whether it’s adding pops of color, enhancing your backsplash, painting cabinets for a brand new look, or updating your floors to water-resistant SPC flooring, we’ve got ideas to seriously upgrade your kitchen’s look this summer. And to make your project go as smooth as possible, we’re including pro tips and time & cost estimates, too. Let’s dive in!

DIY Idea #1 – Add Pops of Color with Hardware
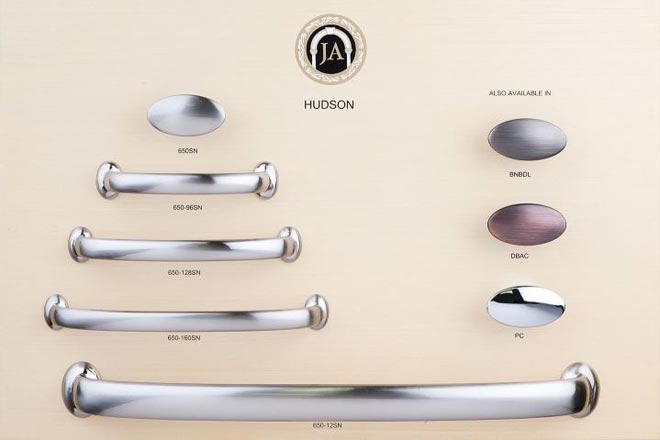
Kitchen cabinet hardware is like jewelry for your kitchen. You don’t wear the same earrings every day, so why should your cabinets wear the same knobs and pulls year after year? Whether you use handles or knobs is a matter of personal preference. To make the project as easy as possible, replace handles with handles and knobs with knobs. Otherwise, you’ll need to fill holes in cabinet doors and drawers or drill new holes. Not impossible tasks, but tasks best avoided just the same.
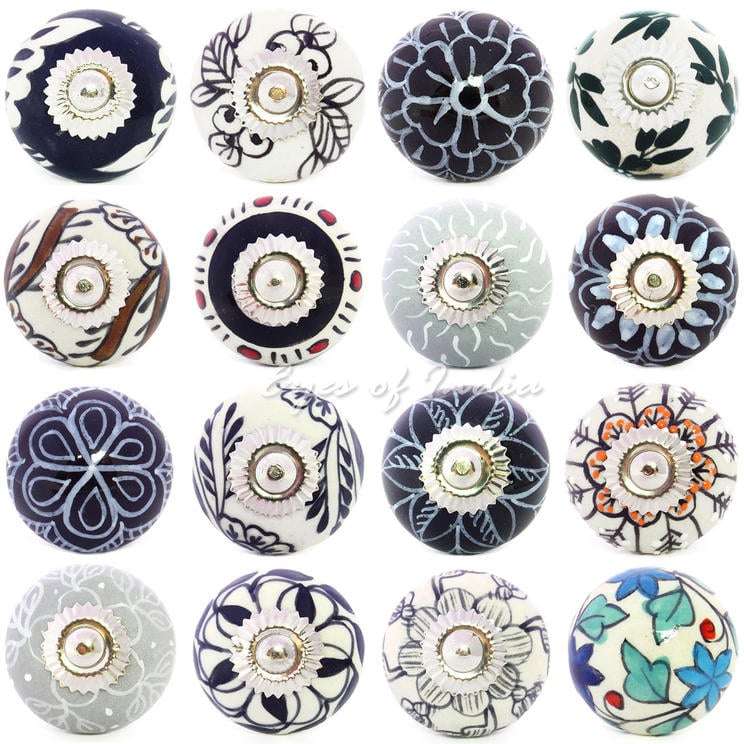
These knobs are just a sample of the hundreds of thousands that await you on the internet. Any of these beauties would add that perfect pop of color to white, gray, or blue cabinets. So, shake up those Shaker cabinets and drawers with new knobs and handles.
Keep in mind that kitchen surfaces need to be easy to clean. So, stick with knobs and handles with smooth surfaces and avoid intricate filigree and etching. They are much easier to maintain. Let lines and colors add interest.
Tools & Supplies Needed
For simple change-outs, all you need is a screwdriver! Just grab a flat head or Philips head, depending on the screw your hardware uses.
How-To
This DIY kitchen project is so easy you’ll wonder why you didn’t do it before. Simply hold the old knob with one hand while you unscrew from the backside of the door. Which way do you turn? Remember: Rightie tightie – leftie loosie! Turn the screwdriver to the right (clockwise) to loosen the screw and turn it to the left (counterclockwise) to tighten the screw. Just keep a firm grasp on the knob or handle and removing the screw will be easy. Take the old knob or handle off and place the new knob or handle in its place.
Estimated Time to DIY
The time to complete this project depends on the number of pulls or knobs you want to replace. Once you get the hang of it, it will take less than 5 minutes to remove the old hardware and install the replacement piece.
Cost
Knobs and handles can run from $1 to $4 or more each. Plain wooden knobs and pulls are available if you want to custom paint them yourself.
PRO TIP FOR SAVING TIME:
A cordless drill will cut the time to change in a knob in half! When you keep the same style of hardware (replace a knob with a knob) you’ll avoid the need to fill old holes and drill new ones, simplifying the project.
DIY Idea #2 – Give Your Kitchen Some Personality with a Backsplash
Backsplashes protect walls from water and grease. That’s a boring job, but that doesn’t mean backsplashes need to be boring. Especially when there are so many peel-and-stick tiles on the market today. Once upon a time, a tiled backsplash required laying tile. Luckily, that’s a thing of the past! If you can mark a straight line, remove the paper backing, and stick tiles to a surface you can add a tile backsplash.
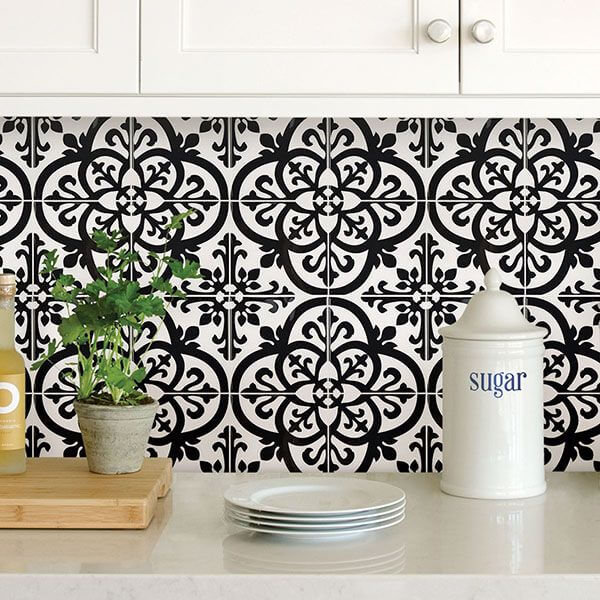
Image Courtesy of Wallpops
The intricate design you see above was created with 10” by 10” panels. Each panel looks like 4 tiles. Now you know the secret, you see how simple this DIY kitchen project can be.

Image Courtesy of Wallpops
This Tuscan-inspired backsplash peel and stick panel provides 16 tiles per panel. And it makes an amazing backsplash.
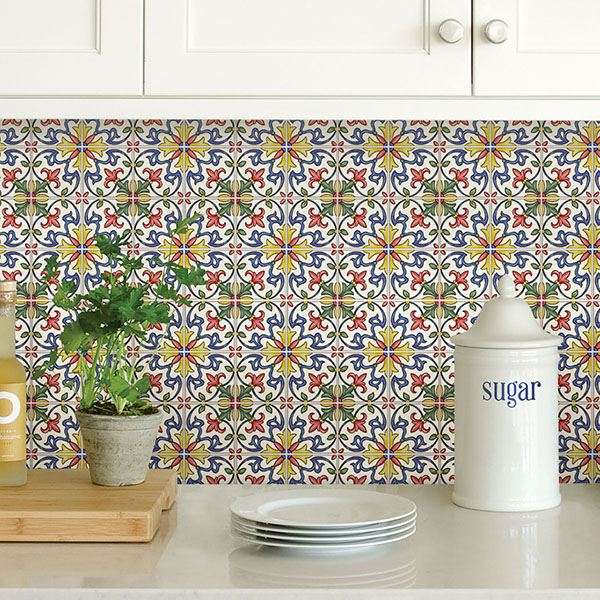
Notice how the exact kitchen scene looks entirely different with a graphic black and white tile and this glorious Tuscan-style tile? It’s pure sorcery!
Okay, it’s not sorcery but the results are magical. And even newbie DIY’ers can take on this project. Consider hiring a kitchen designer if you have doubts about your eye for interior design. Alternatively, many wannabe designers find ideas via Pinterest!
Tools & Supplies Needed
To create a beautiful backsplash with peel and stick tiles, you need a few simple tools. You’ll need a screwdriver to remove any switch plate covers and electrical outlet covers, a level, a pencil or plumb bob to mark your guide, and scissors or a utility knife to cut the tiles.
How-To
This DIY kitchen project is very easy provided you get that very first row completely level. Here’s how to do it. Using your pencil and a level or a plumb bob, mark a level horizontal line above the countertop. This will be your guide for the first line. Now simply peel back the paper to expose the adhesive and line the tile up to your guideline. Once the tile is perfectly aligned, firmly press the tile in place. Don’t press down until you are sure the tile is where you want it! These tiles have very strong adhesive and pulling it back up will be like a workout at the gym. Well, okay, not exactly like a gym workout, but it isn’t easy. Now simply place the remaining tiles making sure to match the grout lines. Use your pencil and scissors or utility knife to cut tiles.
Estimated Time to DIY
The time to complete this project depends on the size of your backsplash. Even in a large kitchen, this is a project that can be completed in a single day.
Cost
Costs vary widely. And making comparisons isn’t always easy. Some places charge by the tile and others by the square foot. And then others like Wallpops sell in 4 tile packages. To make an apples to apples comparison, just break down each product into a price per square foot. You’ll find most quality tiles cost from $3 to $5 a square foot.
PRO TIP FOR INSTALLATION:
Always let the tiles acclimate to the kitchen environment for 48 hours prior to installation. If you want to install over the weekend, buy your tiles by Thursday evening. Don’t even attempt to install this type of backsplash on a textured surface such as plaster, unpainted drywall, or over wallpaper. It just won’t stick well enough to give you a lasting backsplash. If you’ve recently painted the backsplash area, wait at least 4 weeks before installing the tile to give your paint time to thoroughly cure.
DIY Idea #3 – Renew Your Kitchen Cabinets with Paint
Now this job will take longer and require more tools, but there’s no reason you can’t paint your kitchen cabinets over a weekend. The actual painting time may not take as long as you think. But the preparation time and drying time are extensive – longer than the time to paint! If you decide to paint your cabinets, go ahead and plan on being without a fully-functional kitchen for a day or two. (Delivery for dinner, anyone?!)
You won’t regret it. If you want to completely change the look of your kitchen, painting the cabinets will do the trick.
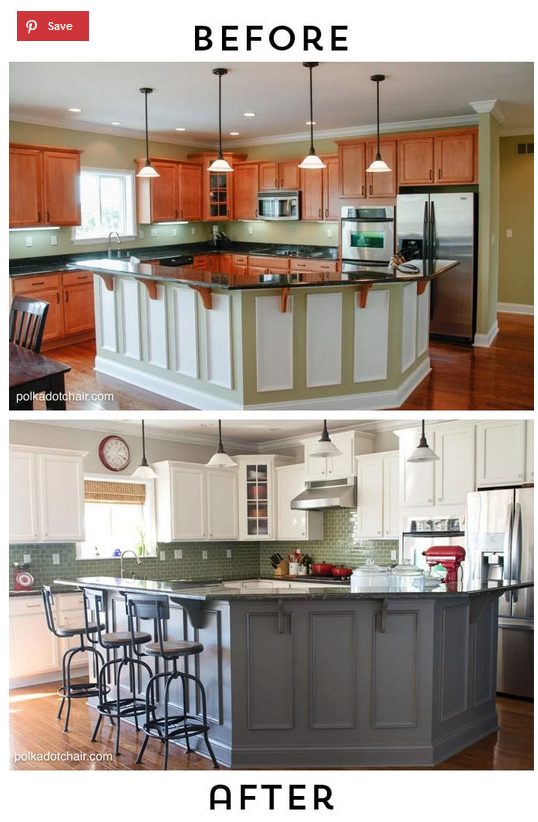
Source: Polkadotchair.com
Melissa over at Polkadotchair.com completely changed the look of her cabinets by painting them a bright white and then using a dark gray as a contrasting element on the base of the kitchen island. Wait you say! White isn’t a pop of color! Yes grasshopper, you are correct. But you’ve got to admit that the dark gray pops because it contrasts with the white.
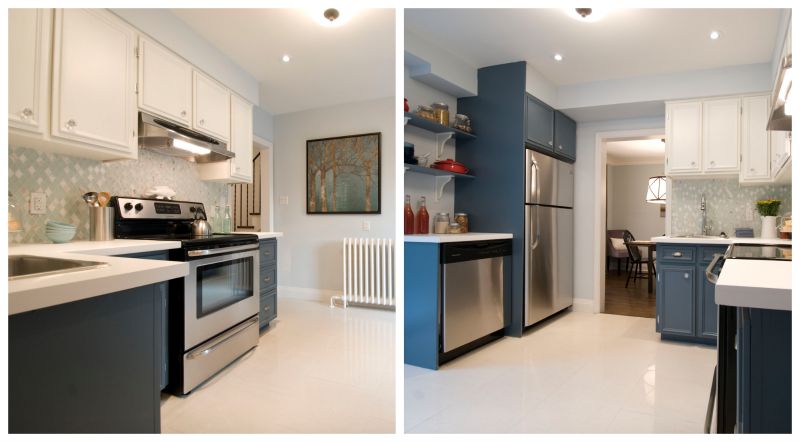
The key to great results is taking your time with prepping and allowing plenty of time for the paint to dry. And don’t be afraid to use different colors on the upper and lower cabinets. That approach may be trendy now, but it also is a timeless look.
Tools & Supplies Needed
This project requires a few more tools and supplies. To prep the cabinets, you will need drop cloths,100-grit sandpaper, cleaner and deglosser, and dry tack cloths. For painting, you’ll need painters’ tape, paint brushes, rollers, primer, and paint such as Valspar Cabinet and Furniture Enamel or Farrow & Ball gloss paint. For drying, you’ll just need patience and perhaps a fan to keep dust from settling while the paint dries.
How-To
Start by prepping cabinets, doors, and drawers so they provide a surface to which the paint can adhere. The more effort you put into the prep, the better the paint will look. Place your drop cloths to protect floors and countertops then sand all surfaces with 100-grit sandpaper. This roughs up the surface just slightly and makes the paint stick better. Then thoroughly clean all surfaces with a cleaner or deglosser.
Kitchen cabinets suffer from exposure to grease, food, and even residue from cleaning supplies. This invisible (or even worse – visible) film prevents the paint from adhering. If you don’t get the surfaces completely clean, you may run into streaking and bubbling while you paint, or your painted surfaces may chip or peel in just a few months. So clean them well with trisodium phosphate or for a more eco-friendly solution: TSP substitute. Once everything is clean and dry, wipe all surfaces down once more with a dry tack cloth to remove lint or dust.
Prime & Paint
Apply one coat of primer with your paintbrush or roller and work with the grain. Allow the primer to dry according to directions on the label. Some primers require you to sand after priming. Read the label and follow the product directions. When it is time to paint, wipe down the surface again with your dry tack cloth and apply the first coat of paint against the grain. After the first coat of paint dries, you’ll apply a second coat, and this time and for any subsequent coats you will work with the grain. Read your paint label, you may apply 2 or 3 coats.
Estimated Time to DIY
Depending on the number of cabinets you have, the prep work necessary, and the drying time for your paint this project can be completed in 2 to 4 days. Drying time is key and varies by paint. For example, the Valspar Cabinet Enamel dries in one hour and the Fox & Barrow full gloss requires 4 hours to dry between coats. If you want to paint over a weekend, start your prep work on Thursday night and finish it on Friday night. You’ll be ready to start painting Saturday morning.
Cost
Good paint isn’t cheap. And if you are going to take the time and energy to paint your cabinets you might as well use good paint. Figure about $50 to $60 a gallon for premium paint. Then another $20 to $30 for prep supplies, depending on what you already have on hand.
PRO TIP FOR GETTING THE BEST RESULTS:
You’ll have better results with the finished project if you take the time to remove the doors from the cabinets and then remove hardware from the doors. Use a bit of painters’ tape to mark each door and cabinet (for example 1LD, 1LC for the first lower door and first lower cabinet) so assembly is a breeze once the paint has dried. Tape the screws to the hinges and when it’s time to reattach the doors, you won’t be searching for the screws.
DIY Idea #4 – Install Water-Resistant SPC Floors
In case you couldn’t tell, we’ve been slowly working you up from the easiest DIY kitchen remodel projects to those that require more tools and skill. We’ve arrived at the top, which is ironically the floor. The kitchen floor, that is!
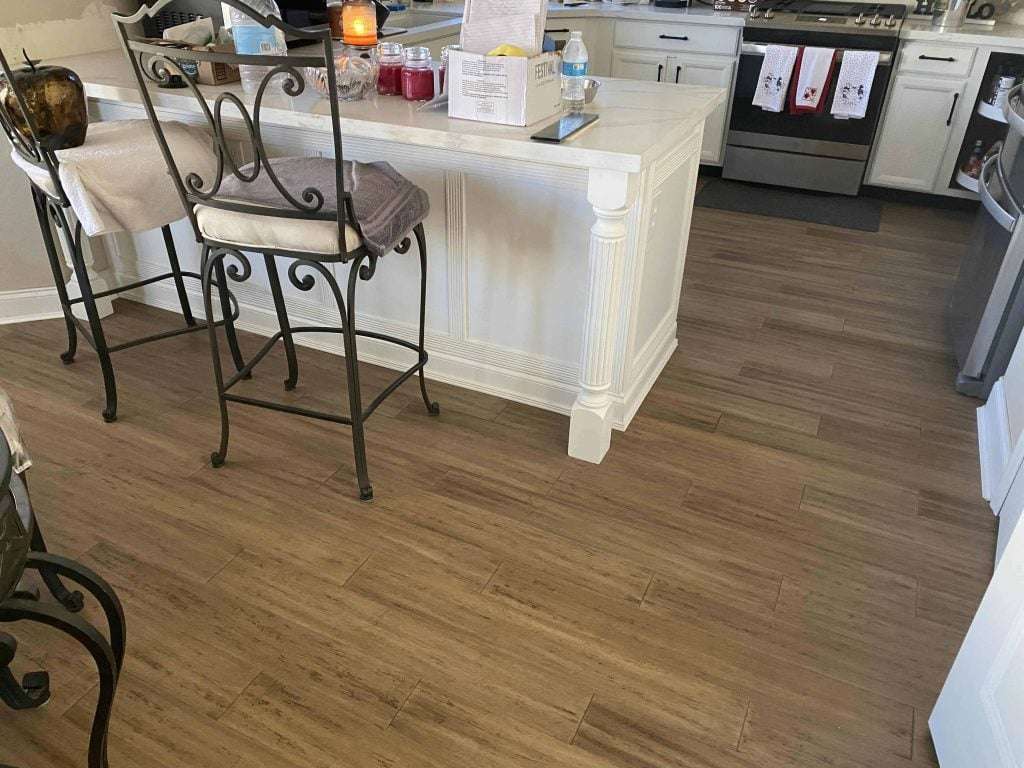
Give your kitchen a major facelift with new floors. Water-resistant SPC flooring is much more practical for kitchens than traditional hardwood flooring. SPC refers to the floor’s rigid core, made of Stone Polymer Composite, which makes it both water-resistant and super durable. That means it can stand up to all that your kitchen dishes out.
Some of these floors are made with vinyl and designed with a real-wood look. You can also find SPC flooring that is more eco-friendly and uses sustainable materials for the surface layer, like bamboo.
This way, you get the appeal of beautiful, natural hardwood OR a gorgeous surface made of real strand woven bamboo, all without the high price point. And you’ll find that installing these click-lock rigid core floors is much more DIY-friendly than installing solid natural hardwood. You don’t even need a nail gun or special glue!
If you purchase your SPC flooring from Ambient, the underlayment is already attached to each plank. That takes a huge step out of the install process. It also makes this kitchen upgrade very approachable as a DIY-er.
Tools & Supplies Needed
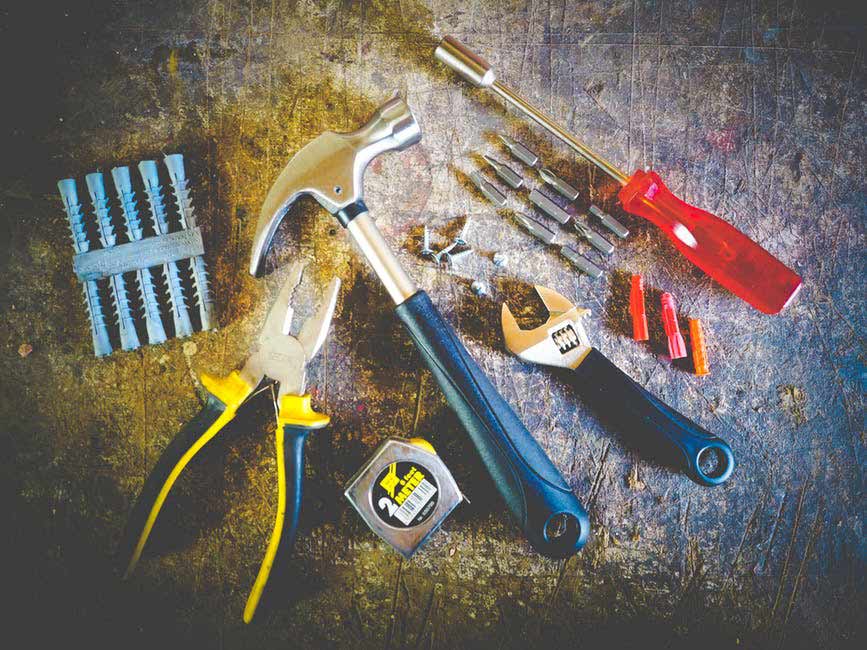
This DIY project requires you to be comfortable with power saws. You’ll need a circular saw and a jigsaw as well as a miter saw or a miter box. In addition, you’ll need a measuring tape, a rubber mallet, a T-square, and 1/4″ spacers.
How-To
Like painting, installing a floor requires surface preparation. SPC flooring can be installed over a concrete slab, existing hardwoods, or just about any other subfloor. Just make sure the area is clean and level. Another important thing to note is that most rigid core flooring needs little to no acclimation.
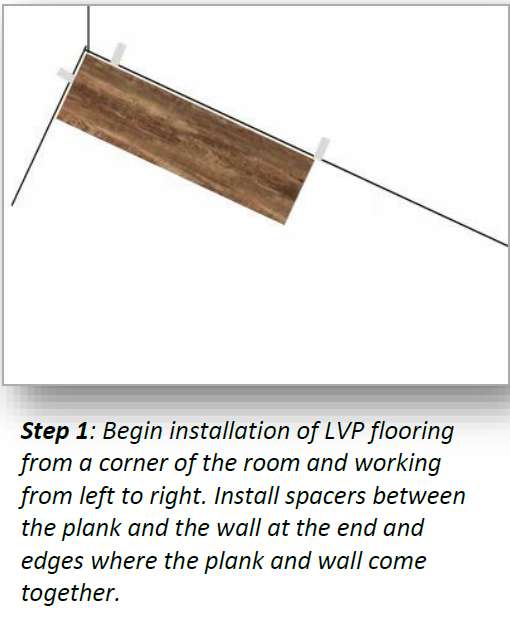
Start the install in a corner of the room.
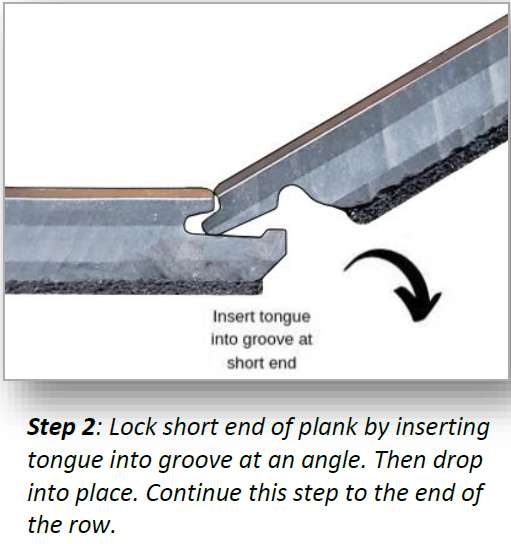
Attach the next plank by inserting the tongue of the new plank into the groove of the second plank. Just line it up and drop it down.
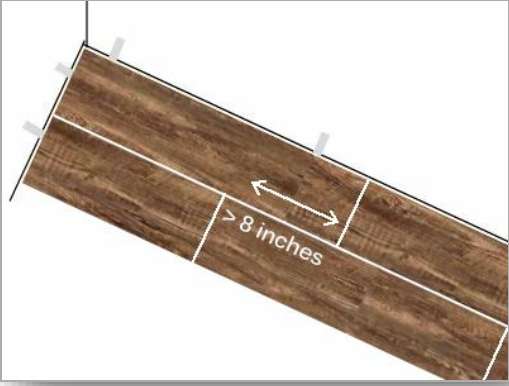
Continue to the end of the row. When you start the second row, cut the first plank of the second row shorter than the first plank on the first row. This staggers the planks and avoids weak “H”-shaped joints.
Now lock the long edge of the plank into the plank on the first row. Drop it down to click in place.
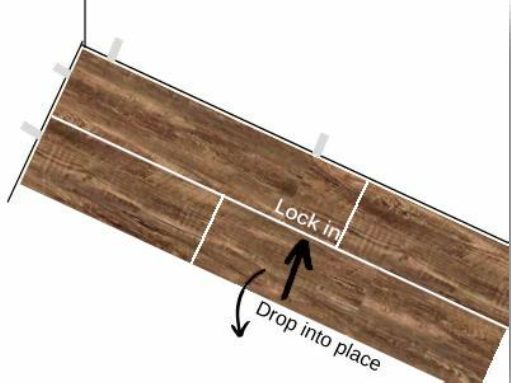
Now, take your rubber mallet and a wood block and tap the plank into place. This step is crucial in securing the plank. Make sure there are no gaps, then proceed to place the next plank. When you get to the final row, you’ll use your mallet and a pull bar to lock the last row in place.
Estimated Time to DIY
The time to complete this project depends on the size of your kitchen floor and the number of cuts you need to make. Unless you have a large kitchen, this project can be completed over a weekend.
Cost
Like paint, if you are going to invest the time and effort, you might as well put down a good quality floor. Luckily, high-grade SPC vinyl and rigid core bamboo floors are very affordable. Plan on spending between $3-$5 per square foot. Honestly, when you see how good the kitchen looks, you’ll want to do the laundry room, too. It’s really that affordable!
PRO TIP FOR WORKING AROUND CABINETS/ISLANDS:
What about those cabinets? The good news is that installing rigid core click-lock flooring doesn’t require you to remove the kitchen cabinets or your kitchen island. Because this type of flooring “floats,” it needs room for flexibility. You won’t have that with cabinets on top of the floor. So, unlike solid hardwood, SPC flooring is installed right up to the cabinet base. Just use a little decorative molding like quarter-round to give the flooring a finished look. Knowing this tip makes this DIY kitchen project seem just a little easier, doesn’t it?!
Which DIY Kitchen Project Did You Try?
 Did you tackle knobs and pulls, toss up a new backsplash, splatter some paint, or get down to business with a new floor?
Share your DIY kitchen project in the comments below.
We love to see how our ideas inspire you!

About the Author
Cheryl is our go-to guru for all things sustainable living. She’s on a mission to make your family and our planet thrive! With a heart as big as her passion for sustainability, Cheryl brings you the freshest insights on eco-friendly building products and energy efficiency. 🌱💡
And hey, did you hear about the eco-friendly lightbulb that went to therapy? It finally found its inner “enlightenment”! 😄 Join Cheryl on this green journey, where she’ll tackle your concerns with a smile and a sprinkle of eco-humor!
1 thought on “Cooking Up DIY Kitchen Remodeling Projects this Summer”