


Set yourself up for success
Please note that the instructions on this page are meant to serve as a general guide only and are not complete. To download the full installation guide and requirements please click the button below
Before You Begin
Our flooring products are quality inspected before packaging and shipping. Nevertheless, a preliminary jobsite inspection of your flooring should be performed for grade, color, finish, and quality—ensure adequate lighting for proper inspection. If you find an irregularity in your flooring (that exceeds the 5% industry standard), please contact your vendor immediately for replacement. The installer and/or owner of our bamboo/eucalyptus floors have the final inspection responsibility as to grade, manufacture and factory finish. The installer must use reasonable selectivity (common sense) to hold out, relocate in hidden places, or cut out pieces with glaring defects, whatever the cause. Installation of any material serves as acceptance of that material and Manufacturer will not accept responsibility for flooring installed with visible defects.
We highly recommend a careful review of the National Wood Flooring Association's Pre-Installation Checklist before beginning your project, to account for any unexpected situations and to ensure the installation environment is suitable and ready to accept the type of flooring you plan to install.
We've organized our bamboo flooring installation guide into three different pages. Click the link to view the appropriate page. If you have further questions about how to install bamboo flooring, please contact us.
As with traditional wood floors it is the end-user's responsibility to provide and maintain appropriate humidity levels between 40%-60% via the use of humidifier and/or dehumidifier to avoid separation and/or damage to the flooring planks. DO NOT USE A WET MOP OR A STEAM MOP ON A WOOD/BAMBOO/EUCALYPTUS FLOOR.
When our bamboo/eucalyptus flooring is ordered, approximately 7% to 10% should be added to the actual square footage needed as allowance for cutting and waste. Should an individual piece be doubtful as to grade, manufacture, or factory finish, the installer should not use that piece. Do not throw these pieces away, in order for you to receive a refund we will need to pick up all defective items. Do not discard original carton packaging in the event you need to return flooring. We only accept returns in original packaging.
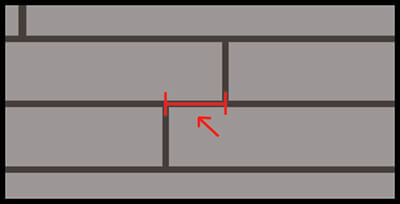
It is the installer’s responsibility to ensure a snug fit between all planks via the use of a racking system or a block and tap method, to ensure that flooring planks fit tightly together on all sides. If the installer is not able to achieve a tight fit between planks they should remove them and attempt a tighter fit with new plank(s).
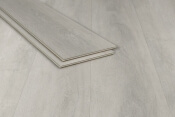
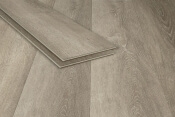
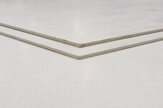
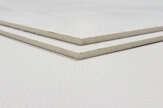
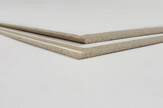
Very Important: the cut ends of the planks should only by placed at the edges of the installation and should be covered by perimeter moldings like baseboard or quarter round to prevent them being walked on. When a plank is cut on its sides or ends the exposed/cut edge is not warranted for foot traffic as it is not finished. Only full planks with micro-beveled edges on all 4 sides should be laid in areas experiencing foot traffic.
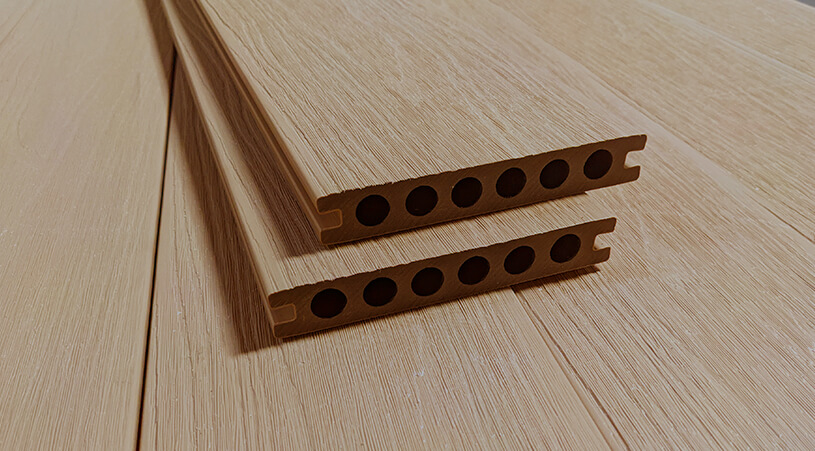
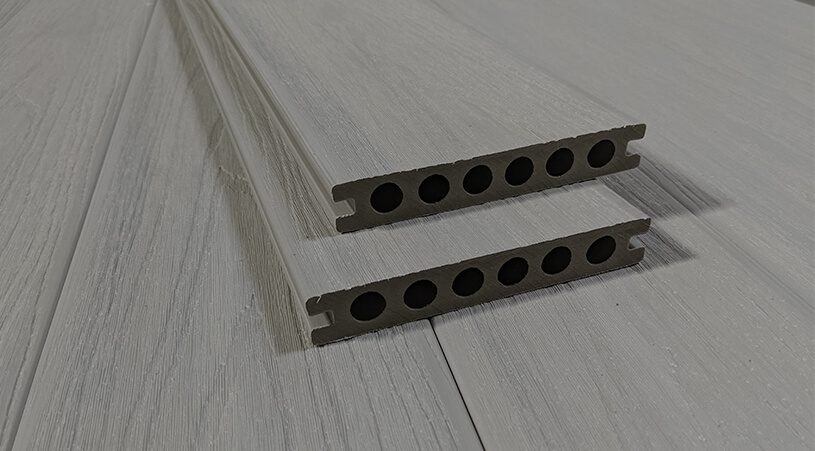
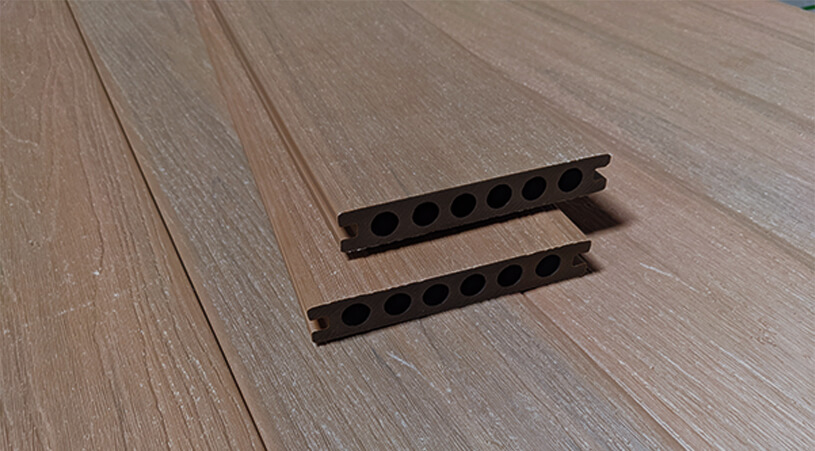
All of our tongue and groove floors can be either nailed down or glued down (ensure to read about required tools and adhesives further down in this document). If you’re gluing one of our polyurethane finish floors down, we highly recommend that you purchase adhesive remover wipes and use them to wipe off the glue as you’re installing bamboo flooring. If the glue cures on top of the finish it may be impossible to remove without damaging the finish, which will result in having to cut out and replace the affected planks.
The use of paint thinner, mineral spirits, turpentine and certain abrasive chemicals may irreparably damage the finish. Ensure to test all cleaning agents on a sacrificial plank prior to use.
5 Frequently Asked Questions About Bamboo Flooring Installation
- Q: How is bamboo flooring installed?
A: Bamboo flooring is installed exactly like traditional hardwoods which means when it comes to installing bamboo flooring you have a multitude of options including floating, glue down, and nail down installation.
- Q: What is the most economical installation method?
A: The most economical installation method is the nail-down method, which is one of the fastest ways, as well. For nail down installations, it’s best to use a 15 lb felt paper as underlayment but remember that felt paper does not serve as a moisture barrier. Additionally, make sure you are using 18 gauge L cleats for all nail down installations. Floating installations are also economical, but usually, the 3 in 1 underlayment adds a bit of cost.
- Q: Is a special nail gun required for nail-down installation?
A: If you aren’t using the right kind of nail gun, you could end up dimpling your floors. There isn’t one particular type of nail gun that is required for installation, but since strand bamboo is so dense, it’s recommended to use a high PSI, high-quality 18 gauge pneumatic nailer. The Primatech Q550 ALR is the most popular option due to the high quality of the gun, the adjustable depth mechanism, and the slide rollers. It’s important to note that these nail guns require an air compressor.
- Q: How much bamboo flooring should I order?
A: If you want to make sure you’re getting enough material, it’s best to identify how much flooring you’ll need and then order 10% extra for cutting and waste. Though you can probably get away with an additional 7% or 8% if you are careful about making cuts or have a large square room.
- Q: Am I able to install the flooring diagonally?
A: Yes, you can install bamboo flooring diagonally across a room. Keep in mind, you will likely need to order an additional 15% of the material for cutting and waste instead of the standard 10% extra.
Important Note About Using Tape To Secure Planks Or Moldings
Use only 3M/Scotchguard #2080. Do not leave any tape on any finish surface for more than a few hours or it will damage the finish.
Important Note About Installing Moldings
If you choose to glue down stair treads or stair pieces, make sure to use an adhesive that is not water or latex based. Using an adhesive that releases moisture will damage the moldings and cause splitting, cracking and possibly warping. We recommend that you use the same adhesive on the moldings as was used to glue down your flooring. Once the molding piece is glued down, place a heavy object on top of the molding for a period of at least 8 hours to ensure a cohesive bond.
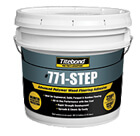
Installing strand bamboo/eucalyptus trim pieces with a nail gun can be more difficult than trim pieces made of other materials. The strand woven material in particular is extremely dense and you will need to either a) pre-drill these moldings and then nail them, b) glue them in using an adhesive such as Titebond Premium Wood Glue, or c) use a nail gun that can fire a 1" long micro thin nail (we suggest the Bostich Porter Cable 23 GA gun with a 1" long micro thin nail - this can be purchased directly from Bostich or rented).
Installation Over Radiant Heat Systems
Our 9/16” thick multi-ply engineered bamboo flooring is warranted over radiant heat, and must be used in combination with an IXPE closed cell 3 in 1 underlayment with a minimum thickness of 2mm. Eucalyptus floors are not warranted over radiant heat systems. Solid bamboo floors are only warranted over radiant heat systems when glued down to the substrate using a vapor barrier adhesive sufficient to seal underfloor moisture and with a spread rate thickness of at least 2mm. All pre-installation and post-installation guidelines outlined below must be followed.
With radiant heat, the heat source is directly beneath the flooring, so the flooring may dry out faster than a similar floor in a home with a conventional heating system. Wood flooring can be installed over radiant heat as long as you understand radiant heat and how it can impact wood flooring – expect some heating season shrinkage. Before installing our floors over radiant heat we highly recommend reading the section titled "Installation Over Radiant Heat Systems" in our official Installation Guidelines.
Acclimation
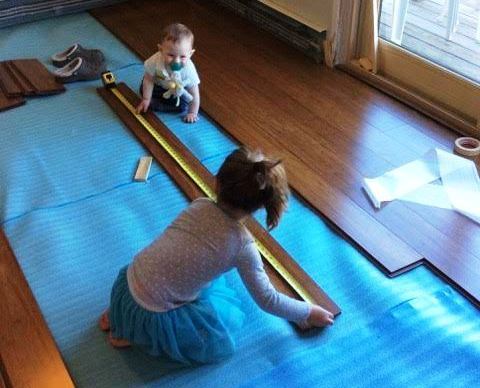
All of our flooring products must be acclimated for a minimum of 72 hours prior to installation, following the bamboo flooring installation guide steps below:
- Must be acclimated in the same room and environment in which they are going to be installed, with the climate control on.
- Make sure at least one long side of the box (side, not top or bottom) is cut open and both end flaps are cut open, including the interior plastic.
- Do not acclimate over concrete or carpet with concrete under it unless you first lay down a 6 mil or thicker moisture barrier down first.
- Stack the boxes up to 5 high, cross stacking is preferable.
- If you live in an area with abnormally low or high humidity it is preferable to acclimate for least 7 days.

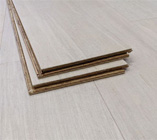
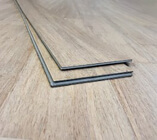
Tools needed
- Rubber mallet
- Tapping block
- 40-tooth or greater CARBIDE saw blade (Diablo is recommended)
- Spacers (wood or plastic)
- Chalk line
- Tape measure
- Carpenter's square
- Felt or rosin paper (for nail down installation)
- If a nail-down installation: Note that not all nailers work with strand bamboo/eucalyptus, as it is much more dense than traditional hardwood and you may need to rent a more powerful nail gun (see recommendations in the Nail Down section of these instructions). You can also rent one by calling your Manufacturer representative
- If you're installing quarter round or shoe molding, you will need to use a 23-gage micro pin nailer (can be rented at most local big-box stores)
Jobsite Requirements
Prior to installation of any flooring, the installer must ensure that the jobsite and subfloor meet the requirements of these instructions. Manufacturer is not responsible for floor failure resulting from unsatisfactory jobsite and/or subfloor conditions.
Flooring should be one of the last items installed on any new construction or remodel project. All work involving water or moisture should be completed before floor installation.
Room temperature and humidity of installation area should be consistent with normal, year-round living conditions for at least a week before installation. Room temperature of 60 degrees to 70 degrees Fahrenheit and humidity range of 40% to 60% is recommended. Bamboo/eucalyptus flooring is a living material which is hygroscopic and therefore reacts to changes of relative humidity and consequently, its dimension changes. When humidity is highest in the summer this humidity is absorbed by the bamboo/eucalyptus, which causes it to expand and in extreme cases it will “cup" because of the bamboo/eucalyptus strips pushing against one another. These variations can be minimized with proper ventilation, heating or by the use of a dehumidifier. Alternately, in the winter when the humidity is low and the heating system is on, the bamboo/eucalyptus releases its humidity and consequently shrinks or contracts. It is then recommended that you use a humidifier in order to minimize the shrinkage.
Store your flooring at the installation site for 72 hours before installation to allow flooring to adjust to room temperature and humidity. Do not store the flooring directly on concrete or near outside walls. Our engineered flooring is acceptable for below-grade installation and basements when used with a underlayment pad that has a moisture barrier. We do not provide a warranty for our solid floors when installed in basements.
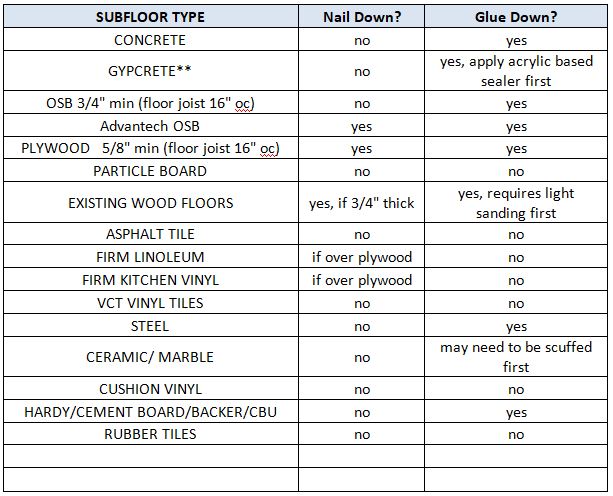
Acceptable Subfloor Types
**The table below refers to the installation of solid tongue and groove bamboo/wood flooring. If you are installing a floating wood/bamboo floor, the only requirements are that the sub-floor be level, clean and dry (or a valid 3 in 1 vapor underlayment is used to mitigate sub-floor moisture), and that you follow any run limit requirements that may apply in installations with high humidity variation throughout the year (details in “FLOATING INSTALLATIONS” section below).
Subfloor Requirements
- Must be structurally sound
- Must be clean - thoroughly swept and free of all debris
- Must be level - flat to 3/16" per 10-foot radius
- Must be dry - subfloor must remain dry year-round. The moisture content of a wood subfloor must not exceed 12%, concrete moisture content must not exceed three pounds.
Important note about Gypcrete: Gypcrete will sometimes exhibit a layer of debris that floats to the surface while being poured. This is usually obvious and if it occurs will need to be removed with coarse open grit paper on a buffer until a solid surface is reached. You will then use a diluted coat of acrylic primer to seal the surface; however it must soak in and not leave a film. Once the gypcrete is prepped and primed you can proceed with a normal installation.
A note about Lauan/Luan/Luaun: While most urethane adhesives bond to Luan and thus you could glue our floors down to it, Luan is generally considered an unstable substrate for tile or hardwood flooring. It doesn’t have much strength, so it may contribute to squeaking or bouncing. Our recommendation is always to remove it before installing a new floor.
Wood subfloors must be dry and well secured. For nail-down installations, nail or screw every 6" along joists to avoid squeaking. If the subfloor is not level, sand down high spots and fill low spots with an underlayment patch or self-leveler such as Bostik Duralevel 83P Self-Leveling Underlayment.
Concrete must be fully cured, at least for 60 days. If it is not level, grind down high spots and fill low spots with leveling compound. The concrete must be flat to 3/16" per 10- foot radius. Do not install on concrete unless you are sure it stays dry year-round. All concrete must be tested for moisture, or a moisture barrier product must be used. We offer Bilders Ultimate moisture barrier, adhesive and sound barrier all in one.
How To Test a Concrete Subfloor For Moisture
As concrete hardens, it traps moisture that is slowly released over time. Ensure to use an approved moisture testing system like the ones outlined in this video. More examples of tests that can be used to determine sub-floor vapor emissions:
- Tape a plastic sheet to the concrete and wait 72 hours. Test the moisture level in the air under the sheet with a dew point hygrometer.
- Weigh a package of dry calcium hydroxide before placing it under a plastic sheet taped to the floor. Wait 72 hours, remove the calcium hydroxide and weigh again. The weight difference will indicate how much moisture was absorbed.
- Drill a small hole in the concrete and test it dew point hygrometer. Wait 72 hours and test again and the difference in reading will indicate the amount of moisture in the floor.
Applications
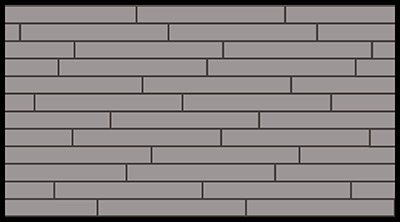
Please refer to the recommended installation matrix at the bottom of this document. Depending on the product, the floor may be nailed or glued down over wood subfloors, glued directly to concrete subfloors on or above grade, or installed as floating flooring. (If installed below grade, a moisture membrane must be used. We recommend using a 3-in-1 membrane.) For all types of installation, joints must be staggered 10" to 20". Bridging the flooring across the floor joists is recommended. Note: Ambient does not recommend installing on particleboard (OSB is the only exception), unless the application is a floating floor.
Subfloor Preparation
Surfaces must be clean, dry, smooth and free of dirt, wax, oil, paint, curing agents and other contaminants that would interfere with adhesive bond. Old resilient floors can be installed over provided above conditions apply. Wood subfloors must be sanded level prior to new installation. In a glue-down installation, the use of a self-leveling product is acceptable as long as it is compatible with the underlying adhesive.
Concrete subfloors must have all cracks and holes filled with a cement-like patching material. While bamboo flooring is more stable than most woods, it is still subject to damage when in direct contact with a constantly wet slab. The bamboo must be isolated from this type of slab by use of a concrete sealant, reverse vinyl or sleeper subfloor. Concrete subfloors must be tested for moisture and not exceed three pounds per 1,000 square feet using the calcium chloride test.
If the moisture content of the subfloor exceeds three pounds, you must use a moisture barrier product. We offer BildersUltimate, which is a combination of moisture barrier, adhesive, and sound barrier.
Important Note About Crawl Spaces: Cupping in wood floors is a common result when a crawl space is not properly sealed. If you have a crawl space under your home or new flooring, you must properly remedy this moisture. There must be a ground layer cover of 6 to 20 mil BLACK polyethylene film with joints overlapping at least 6 inches, and sealed with moisture-resistant tape, or any recommended puncture-resistant membrane, such as Class C, meeting ASTM D-1745. There must be a minimum of 18 inches from the ground to underside of joists and it should have perimeter venting equal to at least 1.5% of the crawl space total square footage. The vents should be properly placed for cross-ventilation.
Important Note About Installing Bamboo Flooring Over An Unconditioned Space (such as a garage): Subfloor moisture penetration of improperly sealed sub-floors over unconditioned spaces is a common cause of wood floor failure. If you are gluing the floor down over such a space, you must use a 100% urethane adhesive that contains a moisture barrier. If you are nailing the floor down over such a space, you will need to follow these steps:
- In an unfinished space, staple a 6mm plastic sheet to the ceiling of the unconditioned space with joints overlapping at least 6 inches, and seal with moisture-resistant tape. In a finished space, coat the ceiling with two layers of high-gloss paint.
- Lay down two layers of 15 lb asphalt saturated felt paper at a 90-degree angle to each other over the plywood before beginning the nail down installation. Thus, lay down the first layer and be careful not to overlap the rolls as this may cause an un-level surface. Once the first layer is down, install the second layer at a 90-degree direction and take care not to overlap.
Note about gluing down to existing wood floors: it is common knowledge that the installer must first verify if the adhesive being used will bond to the existing wood floor. If installer is not sure, he must sand down the existing wood floor completely prior to glue down.
Work out of multiple boxes (4-6 boxes recommended)
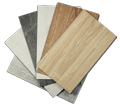
Bamboo/eucalyptus is a natural product and has natural color variations. Mixing cartons creates a natural, random shade effect. Never lay out a floor without paying attention to the overall look. You control the color and pattern of planks that are put down, therefore you control the true color and variation of wood in your floor.
Important note about acclimation: When acclimating our flooring over a concrete subfloor, make sure not to stack the boxes directly on the concrete as this may cause bowing of the flooring planks. It is recommended that you first lay down a plastic membrane or water proof underlayment, then place the boxes on top of that membrane, to acclimate (72 hours). Manufacturer will not take responsibility for any flooring boxes that are placed directly on concrete as this may compromise the flooring.