 Installation Supplies Learning Center
Empower your installation prowess with our Learning Center on Installation Supplies. Master the art of setup and enhancement using top-quality tools, accessories, and expert insights. Dive into our comprehensive resources, tutorials, and guides to elevate your skills and streamline your projects. Unleash your potential with the ultimate destination for installation excellence.
Installation Supplies FAQs
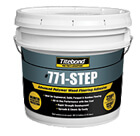
- What are the key benefits of using Titebond 771-Step Adhesive?
- Combines adhesive, moisture control, and sound reduction in one product, saving time and labor.
- No moisture limitations or testing required.
- Water-resistant once cured.
- Provides a strong and flexible bond.
- Suitable for various flooring types and applications.
- Can Titebond 771-Step be used on all types of subfloors?
- Yes, but proper preparation is crucial. Subfloors must be clean, dry, structurally sound, and free of contaminants.
- Primers are required for lightweight concrete and gypsum-based subfloors.
- How do I prepare the subfloor before applying Titebond 771-Step?
- Clean and dry the subfloor thoroughly.
- Scour with 20 grit or #3 1/2 open-coat sandpaper.
- Vacuum loose materials.
- Ensure the subfloor is flat within 3/16" in a 10' radius.
- What's the difference between the "one-step" and "adhesive only" installation methods?
- The one-step method combines adhesive, moisture control, and sound reduction.
- The adhesive-only method focuses solely on bonding the flooring.
- How long do I have to install the flooring after applying Titebond 771-Step?
- The open time is 35-45 minutes, depending on humidity.
- It's crucial to install the flooring within this timeframe.
- Can I walk on the floor immediately after installation?
- No, avoid walking on the floor during installation.
- Wait at least one day before finishing an unfinished floor.
- Full strength is typically achieved within 24 hours.
- How do I clean up wet Titebond 771-Step adhesive?
- We highly recommend with Sentinel Adhesive Remover Wipes. Do not use mineral spirits or strong solvents as they will damage your flooring finish irreparably.
- Follow the solvent manufacturer's instructions.
- Prevent the adhesive from curing on surfaces.
- What should I do if I need to store a partially used pail of Titebond 771-Step?
- Scrape the sides of the pail.
- Cover the unused adhesive with a plastic bag, removing air pockets.
- Seal the lid tightly.
- Is there a warranty associated with Titebond 771-Step installations?
- Yes, the one-step installation method qualifies for an all-in-one warranty, provided there's complete adhesive coverage and no voids.
- Yes, the one-step installation method qualifies for an all-in-one warranty, provided there's complete adhesive coverage and no voids.
- What safety precautions should I take when working with Titebond 771-Step?
- Avoid sanding, scouring, or abrading materials suspected of containing asbestos.
- If asbestos is present, hire a licensed professional for handling.
- Follow solvent manufacturer's instructions when cleaning up wet adhesive.
Q: Do you sell stain or touch-up products to repair floor scratches or gouges?
A: While we don't sell color stain for our floors, we do have some helpful suggestions for minimizing and repairing surface damage on bamboo and hardwood flooring.
Why We Don't Offer Color Stains
We don't offer color stains because they are unstable outside of a controlled factory environment and may change hue over time. Also, since bamboo and wood are natural products, shade variations between lots are common, making exact matches difficult.
Repairing Surface Scratches (White Scuff Marks)
Micro-scratches are common, especially on darker floors. These are usually just in the surface finish and can fade over time with normal foot traffic. You can use the products below to reduce their visibility:
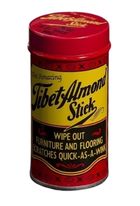
- Tibet Almond Stick - for small surface blemishes
- WearMax Scratch Concealer - seals and blends light scratches
- Rejuvenate Wood Floor Repair Markers - color match pens for light marks
Some customers have also used the meat of a walnut to rub out micro-scratches with success.
Repairing Deeper Gouges and Penetrated Finish
If the damage has gone through the finish and stain layer, start by using a floor marker to reduce visible discoloration. Then, consider filling the gouge with one of the following products:
- Weiman Wood Floors Repair Kit
- Picobello Wood Floor Repair Kit
- Mohawk Fil-Stik or Hard Fill Kit
- Timbermate Wood Filler
Flexible fillers are best for high-traffic areas since they can expand and contract with the floor. Hard fillers may crack over time if exposed to foot traffic.
Touching Up Worn or Dull Finish
To restore worn areas or reduce sheen differences:
- Buff lightly using 80, 120, or 150 grit screens
- Apply a matte oil-based polyurethane finish
- Optional: Use Basic Coatings StreetShoe (popular with pro installers)
For best results, apply to a full room rather than spot-treating individual boards. Always test your method on a sacrificial plank or hidden area first.
Important Note: These are general suggestions. Since every floor and repair method is different, we strongly recommend testing your approach on a hidden area before making visible repairs.
No, you don't need underlayment for your BSPC flooring. It comes with a pre-attached acoustic pad that provides noise reduction, moisture protection and a comfortable feel underfoot. This integrated pad eliminates the need for additional underlayment, saving you time and money during installation.
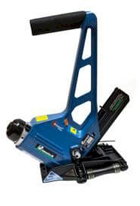
Due to the density of strand woven bamboo flooring, we recommend only using a high PSI, high quality 18 gauge pneumatic nailer, such as a Primatech Q550 ALR or Powernail 50P Flex. These nail guns require an air compressor. You must use an 18 gauge cleat, as larger cleats will cause dimpling. Staple guns will not work on strand woven floors. When nailing down a floor we typically recommend you first lay 15 lb felt paper.
For moldings installation we recommend a Bostich Porter 23 gauge micro nailer or similar gun.
For all nailers, make sure cleats and nails are set properly before continuing to the next row, as failure to do so may result in goosebumps/dimpling. You may need to try several pressure/PSI settings before finding a setting that will work – test on sacrificial planks. Ensure the connector hose, seal, and air compressor are fully functional and have no tears or defects.
If you do not use the correct nail gun or cleat size, you may get dimpling in your floors. Read this important document about goosebumps and dimpling in strand woven bamboo.
NAIL GUN PRESSURE TOO HIGH: ALWAYS practice on a few planks to ensure the correct PSI setting on the nail gun. If the pressure is too high the nail will split the plank. When using the mallet always use small, light taps - as opposed to large, forceful taps – this is the best to get a snug fit.
NAIL GUN PRESSURE TOO LOW: If the PSI is too low you will end up with dimpling (“goosebumps”) on the face of the floor. Always inspect for dimpling from a low angle and with backlighting after installing the first two rows, because it’s difficult to see when standing directly over the area. It is the responsibility of the installer to check each row after it has been nailed down to ensure all cleats are sufficiently embedded in the planks so they don't cause dimpling in the finished floor upon fastening successive rows.
NAIL GUN PRESSURE JUST RIGHT: You will know that the pressure is just right when the cleat is flush or slightly below the surface of the tongue.
Tongues are slightly splitting – that is okay!
When nailing down extremely dense hardwoods like strand bamboo and eucalyptus there is a chance that the tongue on the planks will crack or split when the cleat is driven in. As long as less than 30% of the cleats have splitting around them, and the splitting is minor, this is perfectly normal and is not considered a defect (your floor will still be covered under the warranty if this happens) as the cleat is still firmly driven into the rest of the board keeping it securely in place. When splitting is happening try to use less force when striking the nailer with the mallet. Below is an image showing acceptable splitting, if occurring on less than 30% of the planks.
In short:
- Choose Sound Defender if superior soundproofing is your top priority.
- Choose Super Silencer if you need a good balance of sound dampening, affordability, and easier handling due to lighter weight.
Here's a quick breakdown of the key differences between Sound Defender and Super Silencer underlayment:
- Soundproofing: Sound Defender boasts the higher sound insulation ratings (IIC 85, STC 83) compared to Super Silencer (IIC 74, STC 75). This means Sound Defender will do a better job at dampening both impact noise (walking) and airborne noise.
- Material: Sound Defender is made of solid rubber with a gold-foil backing, while Super Silencer is made of IXPE foam (closed-cell polyethylene foam). Rubber is generally denser and more effective at soundproofing than foam.
- Thickness: Sound Defender is thicker (3mm) compared to Super Silencer (2mm). Thickness typically contributes to better sound absorption.
- Weight: Due to the denser material and increased thickness, Sound Defender is significantly heavier (55 lbs per roll) than Super Silencer (4.2 lbs per roll).
We highly recommend you review our Shipping Policy, which has a lot of great information and a short video about the shipping process. When your order ships out we’ll send you a notification email with all of your shipping information. Once the shipment arrives at the local freight terminal near your delivery location, the terminal staff will call you to schedule a delivery appointment* (weekdays, usually a 2-6 hour window). Make sure you don’t miss the delivery appointment or the freight company may charge a hefty re-delivery fee. *if you have selected commercial/freight dock delivery, freight may be delivered without needing an appointment
Once the order arrives, ensure you mark any damages you see on the driver’s bill of lading (they’ll then usually give you a copy). You don’t have to open and inspect every item, just look at the outside of the pallet – that is where the shipping damage will be. Ensure you write the number of damaged items and detailed notes, then take photos of the damaged items and email all of this information to your Ambient representative to ensure we can ship out free replacements.
Important note: If your delivery location is located on a road that cannot be accessed by a semi-trailer truck, you may be required to pick the freight up at the local terminal or meet the driver at an intermediary location.
We accept the following payments:
1. All major credit and debit cards.
2. Personal and bank checks (please note there may be a 14-day shipping delay).
3. ACH payments.
4. Paypal. In fact, PayPal Credit offers financing.
No!
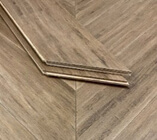
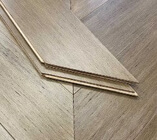
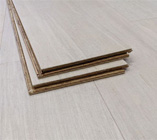
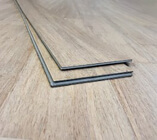
Unlike some brands, the premium quality and design of Ambient's click-lock plank profiles allow for a strong, secure, glue-free connection. After all, adding glue defeats the purpose of a quick and easy click-lock installation. Click lock floors that require a bead of glue during installation suggest they are made of poor quality, and are prone to pulling apart, warping, and buckling, even when glue is added.
Important Note: This applies specifically to our click-lock floors. Some of our other flooring types, like our chevron engineered tongue and groove floors, can be floated using tongue and groove glue, and a bead of glue is thus added into the grooves during installation. Always check the instructions for your chosen floor!
If you're starting a project and planning on DIY'ing it, or in the initial phases and starting to plan the job with your installer, below are some helpful questions you'll want to consider before beginning.
1. What type of subfloor (usually plywood or concrete) will the floor be installed over? This may determine which type of flooring you'll buy (solid vs engineered) and what type of underlayment or glue you'll need.
2. Do you already have a specific plan to float, nail, or glue down the floor, and if so, why? Some people are misinformed about what installation types should be used when. We recommend our article Nailing vs Gluing vs Floating.
3. What other types of flooring will the floor be butting up to? Will you require transition pieces and how many? This will determine what moldings and trim you need to buy. If you're not sure how the moldings are used, check out our Moldings & Trim Guide.
4. How much flooring will you need to complete the job? Have you added waste? It's recommended to add 10% for waste on regular installations, and 15% for waste on diagonal installations.
5. When do you plan to start, and when do you need to receive the flooring material? Remember that it takes approximately 5-10 business days from when you purchase your flooring to when it's delivered.
6. What kind of traffic do you expect on the flooring? Do you have kids, dogs, is it a commercial space? This may help you choose what type of flooring to get, and if you should go with a lighter/darker floor.
7. Will you be installing the floor yourself, or hiring a professional? Either way, you'll want to make 100% sure whoever is installing the floor reads the installation instructions before starting.
We highly recommend reading our Shipping Policy for a comprehensive explanation of our shipping processes.
We ship most freight orders (over 125 lbs) out within 4 business days of purchase, the average being 2 business days. For faster shipment of freight orders, we offer an Expedited Shipping option at checkout however please note that this simply means that we will ship the order out the next business day - it does not shorten the transit time once shipped. For small parcel orders we offer express UPS shipping options at checkout as well; please note that for express shipping services the order must be placed by 2pm EST in order to ship out that same day, otherwise we will process the shipment the next business day. We do not ship out orders, nor do the shipping companies deliver them, on weekends.
For residential lift-gate freight order deliveries, once the flooring order arrives at the local freight terminal, they will call you to schedule your delivery appointment, which is usually a 2-6 hour window on the day of your choosing (weekdays only) when possible. All deliveries are curbside as the freight companies do not offer inside delivery.
You should follow two basic rules when choosing a wood flooring adhesive:
1) If you're gluing the floor down to plywood or other dry substrate, you'll want to use a zero VOC 100% urethane trowel-down adhesive approved for wood flooring installation. I.e. when installing over plywood or a dry substrate you don’t need the adhesive to contain a vapor barrier unless there is a crawl space, garage or other moist environment underneath. If there is a moisture concern, proceed to Step 2 below.
2) If you're gluing the floor down to concrete or any other sub-floor that may be emitting moisture, this will require an adhesive that contains a moisture/vapor barrier. These adhesives are slightly more expensive than basic adhesives but well-worth the investment. We sell an affordably priced low-VOC adhesive with vapor barrier and sound retarder that works not only for bamboo but for all types of wood floors and even some tile; many of our clients even use it on their upstairs floors to keep noise levels down. Important: always make sure to use the correct trowel style and size for the type of adhesive you select or you may not get enough coverage on the floor and this will cause the installation to fail. For example, our vapor barrier adhesive should only be applied with a 1/4" x 1/4" V Notch Trowel.
About Moisture In Concrete. Most concrete slabs emit moisture for up to 25 years after being poured, and installing a floor over such a slab is easy to do, however as with any other job done right you want to make sure you have the right tools, and adhesive, on hand. Moisture is measured in pounds on concrete slabs. Basic adhesives usually protect up to about 3 pounds of moisture. Meaning, if you test the concrete and it comes back higher than 3, you need an adhesive that contains a moisture barrier.
Keep in mind that moisture tests only test the moisture on any given day. A slab may read 8 lbs per square foot one day but then it rains for a week and the moisture rating jumps to 14. Our vapor barrier adhesive mentioned above protects your floor up to 20 pounds of moisture emitted per square foot which is usually more than enough for most slabs, however, it's still always recommended to test the slab moisture emission prior to installation using a calcium chloride moisture test kit. If you have an 'excessively wet' concrete slab or sub-floor (which emits more moisture than the upper moisture limit specification of the vapor barrier adhesive you choose), you'll need to find an unlimited vapor barrier adhesive such as Bostik Ultra-Set Single Step.
The adhesives that we sell are moisture-cured urethane adhesives. These types of adhesives cure (dry) faster when the humidity levels are higher. This is why adhesives usually come with a tack time and a cure time in relation to temperature and humidity. Thus, the same pail opened in Florida may dry in 12 hours where it may take 16 hours in Colorado. We recommend allowing the adhesive to cure at least 12-15 hours before walking on it, and 24 hours before moving heavy furniture back into place.
Freight drivers do not bring products inside the delivery location. For small parcel shipments, delivery policies are determined by the shipping company and may vary. For more details we strongly suggest reading our Shipping Policy.
For flooring freight shipments, standard delivery is curbside with lift-gate service unless you specifically request freight dock delivery. "Curbside delivery" means the driver will lower the pallet onto the street at the end of your driveway. Drivers are not required to enter your property, but if conditions allow—such as a short, flat driveway—they may choose to back up and place the pallet on the driveway.
Materials exceeding 4 feet in width or 6 feet in length, such as bamboo plywood, MagPanel, or decking, must be unloaded manually or with a forklift at the curbside. Large pallets are positioned lengthwise on the truck and require a forklift with 8-foot forks or extensions for unloading. For substantial orders, we recommend having a forklift on-site capable of lifting 4,000 lbs unless alternative arrangements have been made. It is the customer’s responsibility to ensure the appropriate equipment is available at the delivery site to offload large shipments.
It is crucial that the customer, or an authorized representative, be present at the delivery site to accept the shipment, inspect for any external damages, and note any issues on the delivery driver’s bill of lading. Failure to do so may prevent us from providing complimentary replacements. Please note that hiring labor solely to await the delivery is not advisable, as freight companies may miss scheduled appointments, and compensation for such delays is not provided.
For nail down installations, we recommend that you use either 15 lb felt paper (asphalt-saturated roofing paper, essentially) or red rosin paper.
Please note that 3-in-1 underlayment should only be installed under floating floors and should not be used in nail-down installations, as the compressive quality of the pad can result in loose nails, compromised structural stability, and noisy floors.
Yes, we sell several different products that provide sound insulation - underlayment and adhesive. To see these products visit our Installation Supplies page and check out our underlayments and adhesives. Many condominiums have sound insulation requirements for flooring. There are two sound tests that are the industry standard for sound insulation: IIC and STC. We have ratings as high as 83 STC and 85 IIC for underlayments and as high as STC 70 and IIC 66 for adhesives. The biggest benefit to using our high STC/IIC underlayments and adhesives is that you do not need to buy cork or other soundproofing and then pay someone additional to install it. Just float the flooring over the underlayment or glue the floor down using the sound reduction adhesive and you can substantially reduce sound transmission between levels in your home as well as muffling sounds from footsteps.
FLOATING FLOORS. In order to choose the right underlayment you have to ask yourself two questions: Do I need moisture protection, and how much am I willing to pay for sound reduction. When installing over concrete or over a crawl space, an underlayment with a moisture barrier (usually a thin layer of plastic or foil) is a must-have. This protects your wood floor from moisture rising up and damaging your floor from beneath. These are called 3 in 1 underlayment.
What are the 3 features of a 3 in 1 underlayment?
1) Moisture/vapor barrier
2) Impact absorption and sound transfer reduction
3) Cushioning for comfort
Remember that you will still need your sub-floor to be very flat before you begin the installation, as the underlayment only accounts for minor sub-floor imperfections. The second question having to do with how much sound reduction you want is simple - all underlayments have STC and IIC ratings that tell you how much sound they block. The lower the rating, the higher the echo or knocking sound when you walk on the floor. Underlayment with a 70+ STC and IIC rating will muffle noise much better than an underlayment with a 50 STC rating. As you may have guessed, underlayments with higher STC and IIC ratings are more expensive due to the quality of the materials or thickness of their construction.
While it can be a bummer if your shipment arrives damaged – it is not the end of the world! We can easily send you free replacements for anything that was damaged in transit - all we ask is that you do not refuse the shipment and mark any damages on the receipt provided by the driver. After that, please take a few photos of product while it is still on the pallet and email them to [email protected] so we can make a record on your account. Then, please examine the items further once you've brought them inside to determine the extent of the damage, and take photos of affected areas if you require replacements. Once we receive the details and photos we will send out the replacements right away. Most of the time, installers will be able to work around the damage instead of waiting to get replacements. For more information please see our Shipping Policy page.
Occasionally you will have an item with a visible defect either in the stain, finish, or milling. Like most building materials suppliers our effective defect rate is under the industry-standard 3%. However, if you are finding that more than 3% of the product you have ordered has defects, please let us know as soon as possible so we can resolve the matter quickly.
No. When gluing down flooring all you need is a high quality vapor barrier adhesive, and it's compatible trowel. Adding an underlayment is unnecessary and can actually create problems down the line.
Meanwhile, in the event you are installing a floating click lock floor, that's when you'll opt for a high quality 3 in 1 underlayment with high sound absorption and insulation.
We recommend that you review our handy Return Shipping Guide to see the detailed steps to return your order.
If your existing hardwood floor is clean and level, you can usually nail down to it if it is at least 5/8" thick. You can also glue down to an existing hardwood (in most cases) but you may need to perform a light sanding first depending on the finish type (your installer should be able to advise on the best course of action here). In case of either the glue down or the nail down option, we highly recommend that you seek the assistance of an experienced flooring professional.
Yes, we may be able to accommodate this, but please note that we may still apply a small shipping and handling fee to your order. Please reach out to your sales representative for details.
As long as you use an adhesive that contains a vapor barrier, you don't need to use an underlayment as an add-on. Here's a link to our Ironwood floor adhesive with an integrated vapor barrier: Ironwood Vapor Barrier Floor Adhesive.
Several options are available to protect bamboo floors during painting:
- Canvas drop cloths: These durable, reusable cloths offer excellent protection and don't trap moisture like plastic.
- Rosin paper: This breathable paper is designed for floor protection, allowing moisture to escape.
- Ram board: This heavy-duty cardboard is easy to install and remove, providing reliable protection.
- Floor protection paper: Similar to rosin paper, this thinner option is good for short-term protection.
Important Considerations:
- Tape securely: Use painter's tape to secure the edges of your chosen material, preventing paint from seeping underneath.
- Ventilation: Ensure good airflow in the room to help moisture evaporate quickly.
- Daily removal: Even with breathable materials, remove the floor covering at the end of each day to let the bamboo air out.
The links to the policies below can also be found in the footer of our website, and we encourage all customers to review these policies before purchasing.
The waiting time depends on your flooring installation method:
- Nail-down and Floating Installations: No waiting period is necessary for these methods. You can place furniture and resume normal foot traffic immediately.
- Glue-down Installations: Adhere to the adhesive manufacturer's recommended drying time. This is typically around 12-24 hours for most adhesives. Avoid heavy furniture and foot traffic until the adhesive has fully cured.
Tips:
- Use Furniture Pads: Protect your new floor by placing felt pads under the feet of furniture, especially heavy pieces, to prevent scratching.
- Careful with Large Furniture: When moving large furniture across your new floor, use furniture sliders or lift the pieces instead of dragging them to avoid damage.
Yes! Some adhesives will fail spectacularly if you use the incorrect trowel size and design, so using the correct trowel(s) is a must. Always check the adhesive manufacturer guidelines for which trowel to use with the adhesive you select. (usually the acceptable trowels are shown on the adhesive pail, pail label, or installation instructions.
Pro Tip: Don’t skimp when troweling down vapor barrier adhesive or your floors will cup later! The Square notch trowel puts down about 85% coverage which is enough to hold down the floor on plywood or places where a sound and vapor barrier isn't required.
As long as you use an adhesive that contains a vapor barrier, you don't need to use underlayment as an add-on. Here's a link to our Ironwood flooring adhesive with integrated vapor barrier: Titebond 771 Step vapor barrier glue
You can typically safely walk on the floors around 4-12 hours after the adhesive was first troweled down but this depends on the humidity levels of where you live, because moisture-cured urethanes dry at different intervals depending on humidity levels. We recommend reading the adhesive pail label to determine the correct cure time.
Absolutely! We’ve shipped our products to such far-flung locations as Guam, Kenya, Tanzania, Bahrain, Great Britain, Kuwait, France, Mexico, Canada, Hawaii, and many more. Please note that international shipments may require you to procure the services of a freight forwarder at the port of discharge; most port authorities can provide recommendations for reputable freight forwarders that service your home port. Also, minimum order quantities may apply to some countries. Call your Ambient representative today at (866) 710-7070 for shipping quotes to your country!
Alaska Shipments
There are two main shipping options:
- We can arrange direct freight shipments to locations in Alaska that are accessible via standard freight routes.
- To provide an accurate shipping quote, we require the exact item(s) and quantities you require.
- Some carriers may add unexpected fees beyond the original quote, so we recommend verifying final costs before booking.
- The most cost-effective method is to ship to a freight forwarder in Seattle, such as Alaska Freight Company.
- The forwarder will handle the final leg of delivery to the customer’s location in Alaska.
- We offer free shipping on orders over 800 ft² to the Seattle freight forwarder.
Are There Any Special Considerations for Alaska Shipments?
- Remote & Island Deliveries: Some areas, such as the Kenai Peninsula and Juneau, require boat transport for final delivery.
- Customers in these locations will need to arrange for additional transportation after their order arrives at an Alaska-based freight terminal or a Seattle-based forwarder.
- Shipments to Hawaii require a freight forwarder that specializes in island deliveries.
- We recommend Aloha Freight for reliable transport from the mainland to Hawaii.
- Seattle to Alaska: Alaska Freight Company
- Mainland to Hawaii: Aloha Freight
To get a quote for a shipment to Alaska or Hawaii simply send the item(s) and quantities you're interested in to our support team at support@ambientbp.com and a team member will reach out within 24 business hours!
No. Only an 18 gauge cleat nailer should be used to nail down strand woven bamboo and eucalyptus flooring (along with 18 gauge cleats). If you use 16 gauge cleats, they are likely to cause dimpling on your floors as described in this article.
Furthermore, using any cleat or staple other than an 18 gauge cleat may cause cracks and splits in the tongue that will cause further issues down the road.
Need help finding out how many cleats you'll need to nail down your floors? Use our handy cleat/nail calculator!
No, asphalt-saturated felt paper is NOT a moisture barrier (neither the 15lb. felt nor the 30 lb felt). It may help to slow down moisture and have some wicking qualities, but it does not stop it. If you need a moisture barrier for a floating floor, you will need to use a 3 in 1 underlayment. For a nail-down floor, there is no vapor barrier underlayment available, so you will need to seal the moisture concern somewhere below the subfloor, or you will need to glue the floor down with a vapor barrier adhesive.
STC and IIC sound ratings indicate the ability of a material to muffle footfall noise and reduce sound transmissions between levels. An underlayment or adhesive with a high STC and IIC rating will not only reduce sound transmission between levels more effectively, but it will also reduce footfall noise within the room more effectively. Materials with higher STC and IIC sound ratings tend to be more expensive, and sometimes thicker, than underlayments with low sound ratings.
3 in 1 underlayment should never be used when nailing down a floor. These underlayments are nullified as a vapor barrier once you nail through them, and the compression of the pad results in the loosening of the cleats over time, which can result in noise squeaks and also structurally compromise the floor. Most installers use 15 lb asphalt-saturated felt paper when nailing down a floor, it reduces wood-on-wood squeaking and helps wick moisture away from the bottoms of the flooring planks (please note that 15 lb felt paper is not a vapor barrier!).
Remember, if you're nailing down a strand woven bamboo floor, it is required you use an 18 gauge cleat nailer.
Dimensionally stable flooring can be installed over well-bonded vinyl asbestos tile using our trowel down adhesives. However, all waxes and sealers which have likely been applied to the VAT, must be stripped prior to installation. It is prudent for this sort of prep to be done by a licensed asbestos abatement professional. Epoxy can be used as a sealer of asbestos tiles as long as there are no loose pieces, and the key is to abrade the epoxy surface so the glue can bond to it. Please note: we cannot guarantee that other adhesives will bond, so you would proceed at your own risk if you are using adhesives other than those sold by Ambient.
At Ambient, we deeply appreciate the dedication of our nation's military personnel and law enforcement officers. As a token of our gratitude, we offer a 5% discount on all products for active-duty U.S. armed forces members and full-time local and state law enforcement.
To apply this discount, simply enter coupon code "HONOR" at checkout. Please note:
- Clearance items and odd lots are not eligible.
- This discount cannot be combined with other promotions.
- Occasionally, we offer volume discounts that may exceed 5%. In such cases, the military discount cannot be added on top.
Thank you for your service, we truly appreciate all that you do!
We do not recommend installers. However, you have several options available to you to locate a good installer:
- Ask friends and family. Someone you know has had wood flooring installed within the last 5 years. Ask neighbors, friends, family and coworkers if they were happy with their wood floor installer and if so get their name. Contractors appreciate word-of-mouth referrals and some may even offer a "neighborhood" discount. Yelp is also a good way to find installers; look for those with a minimum of 3-5 reviews.
- Do your homework. If a contractor disparages a certain product and tries to convince you to buy one of their own floors, be wary. Sometimes this is done because of a bad experience with a low quality brand in the past, and other times they're trying to earn an extra commission from a product distributor.
- Get at least 3 estimates. Most installers will give you a free estimate over the phone or charge a small fee (from $20-$50) to do an in-home estimate. Try to cover all bases and ask as many questions as possible to get a good sense of their experience and knowledge.
- Pay a fair wage. Doing price comparisons is vital for you as a consumer. The vast majority of floor installers are honest, hard-working men and women that charge a fair wage and are working to support their families. If they go above and beyond it doesn't hurt to give them a tip at the end of the project.
- Request a warranty. The best installers are confident in their installation skills and will offer a warranty to back up their workmanship.
- Plan ahead. You'll want to assume that most installers are booked up with jobs for the ensuing 2-3 weeks, so the earlier you start getting estimates the better off you'll be. Also remember that most of our bamboo floors require at least a 3-day acclimation period, so you'll need to factor that into your plans as well.
For flooring and plywood we strongly recommend ordering a sample before placing your final order, so you can ensure that the shading will be to your liking. Our flooring and plywood samples have a dye lot number sticker on the back of them. Our website checkout process will ask you to type in this dye lot number before final payment; alternatively, if ordering via email or over the phone simply mention this lot number to your Ambient representative and we will update the order with it and ship that exact lot number. If we don't have that lot number available (it has sold out) but we have a matching lot, we will ship the matching lot. If we do not have a matching lot, we will not ship your order until you approve samples of the new lot.
Please remember that photographs on our website are taken from a variety of devices and under many different lighting conditions, and are viewed on a wide range of computer monitors and contrast settings, thus we do not guarantee that any floor will match the photographs on the website. If you order your flooring sight unseen (without receiving samples first), Ambient is not responsible for light or shading variation or differences and thus not responsible for return shipping costs (which can be expensive and can vary greatly depending on where you live and the size of your order).
If you receive the order from the exact lot number you requested, or you order sight unseen (you do not provide a dye lot number at checkout), and you decide after it arrives that you want to return the order, you will be responsible for return shipping charges. For flooring orders, please see our 30 Day Money-Back Guarantee for more information.
Once adhesive cures on a wood flooring surface, it is very tough to remove and may leave behind permanent cloudy/dull spots on your finish, however you can try these steps:
1. Pour a small amount of Bostik Urethane Adhesive Remover on the glue spot, or squeeze a small amount of remover from a Bostik Adhesive Remover Towel.
2. Let it sit for about 15 minutes.
3. Wipe the area clean.
4. Apply adhesive remover again to the same spot.
5. Let it sit for about a minute.
6. Use a Mr. Clean® Magic Eraser® to remove cured glue.
7. Clean the area well.
If the steps above fail, you can also attempt to wear the glue spots down using denatured alcohol, but make sure to test on a sacrificial plank first as overdoing it may also rub off some of the finish. Finally, if none of the steps above work, or you are left with cloudy spots as a result of removing the glue, you will most likely need to cut out and replace the flooring plank.
Yes you can! However you must use our urethane adhesive with vapor and sound retarder** in combination with our Super Silencer underlayment. For maximum effect, you can first glue the underlayment down to the sub-floor, then glue the flooring down to the underlayment. You will need a 1/4 in by 1/4 in v-notch trowel, and some adhesive remover wipes are always recommended when gluing down any floor.
**IMPORTANT NOTE: IXPE-backed flooring is not recommended for glue down installation and is not warranted if installed via this method; however, floors backed with cork underlayment are warranted for glue down installation. Be sure to confirm that your flooring choice is compatible for glue down installations before following the steps above.
There are a few concrete sealer products on the market you can find via basic web search and also some glue down flooring adhesives with unlimited upper moisture limits that are suitable for these types of installations such as Bostik Single-Step. You can always test the moisture levels in your concrete using a calcium chloride test kit.
The IIC and STC ratings represent how much sound blockage there is. For example a rating of 70 is a measurement of the total sound blockage for the whole system (floor + glue) when installed on a 6" suspended slab with a ceiling system beneath. The Delta IIC is the difference in sound AFTER the barrier is put in. I.e. the Delta IIC reflects the change in impact insulation as a result of the floor and glue system. A Delta IIC of 20 is very good.
If you'd like to know more we recommend reading this page.
Cork underlayment is usually recommended because of it’s sound-muffling qualities, but we sell 3 in 1 underlayments that have higher STC and IIC sound ratings than cork (meaning better sound-muffling), so we normally recommend those when installing in the floating method. If you're gluing the floor down, you can use an adhesive that contains a sound barrier.
We have a couple of 3 in 1 underlayments, and the best way to see what each one is comprised of is to visit our bamboo flooring installation and accessories page and read the product details for each product.
Our Super Silencer and Sound Defender have some of the highest STC/IIC sound absorption ratings in the market, are great for condominiums and for muffling foot-fall noise, and are necessary to install floating floors. The Super Silencer is made from cross-linked closed-cell polyethylene foam (also called IXPE foam). The Sound Defender is a 3 mm thick gold-foil-backed rubber underlayment. Both have advanced moisture protection, shock absorption, and include an adhesive strip with overlap film for ease of installation.
Our adhesives do not have any ingredients that are defined as volatile organic compounds “VOC’s” as part of the formulas. VOC is a regulatory description for “solvent” which evaporates into the air and is considered an air pollutant. These formulas contain little to none, so we refer to them as zero VOC. We can calculate "potential" trace VOC values based on the vapor pressure of the individual raw materials used in the formula. Anything with a vapor pressure greater than 2 mmHG at 25C is considered a VOC for these calculations. You can download the MSDS and other technical documents for our adhesives on their product detail pages.
For legal businesses that qualify as a trade account (must be in the building trades), or you plan to order more than $10,000 cumulatively in building materials in the future on multiple projects, we encourage you to apply for a trade account on our B2B page. Our wholesale discounts vary depending on sales volume and can range from 5% to 35% off our retail prices. We also offer container level pricing for large projects at extremely competitive prices, and can manufacture a large array of products not featured on our website such as custom thicknesses, lengths, widths, colors and surface treatments (minimum order quantities apply).
The short answer is – it depends on a lot of factors! There are many different concrete and cement products from various manufacturers on the market today. Because the components are going to differ from product to product, there is no set time frame. Although, the product manufacturer should have instructions that may list drying or curing times. Other big factors are the humidity levels, temperature, and whether or not you have fans blowing as those can all affect curing times.
The best way to determine if the subfloor is ready to be glued down to is to use to perform a calcium chloride test to ensure the vapor emission from the subfloor in question does not exceed the upper moisture limit of the adhesive you plan on using. Take for example our very own urethane adhesive with vapor barrier and sound retarder, which can be used on slabs with moisture emissions up to 20 lbs (per 1,000 square feet). That means if your calcium chloride test results come back under 20 lbs (per 1,000 square feet), then you are good to go! But let us say your test results came back at 6 lbs (per 1,000 square feet) but your adhesive is only rated for 3 lbs (per 1,000 square feet), then your floors are very likely to cup as the moisture in the slab exceeds the capabilities of the adhesive.
The fastest method to take up cured adhesive is to use grinding machines. A clean and less toxic one is a dustless diamond grinder. If you need to scrape glue out of a smaller space, Sentinel is a brand that makes some good non-toxic adhesive removers that will soften the adhesive to allow it to be scraped up easier.
Most glues average around 1-3mm in thickness once cured, however, the exact level can be more depending on the glue spread rate required, and the type of glue being used. Note: for a vapor barrier glue the spread rate should not be less than 2mm.
Typically, if the finished basement is climate controlled, you do not need a moisture barrier in between the subfloor and the new floor you are installing. However, some basements can emit excessive humidity – upwards of 70%. To be sure, we recommend testing the humidity with a hygrometer to get an accurate idea of the indoor air humidity, and you can also test the humidity on the main grade sub-floor itself.
If excessive moisture is coming up from the basement, you have a few options:
1) Glue down the floor using an adhesive with a vapor barrier.
2) Choose a click-lock floating floor and install on top of a 3 in 1 vapor barrier underlayment.
Both of these will seal off your floor and protect it from any sub-floor moisture.
Adhesive remover wipes are designed to clean up wet adhesive before it dries. Wet glue is much more difficult to remove with soap and water, but the wipes have a special compound that helps to break down the glue.
Once flooring adhesive dries it is impossible to remove and will irreparably damage your floor finish, as the topcoats will be stripped away when you remove the dried glue. Absolutely never use mineral spirits to remove any glue from our floors, as mineral spirits will damage uv-cured urethane finishes
If adhesive dries on your finish, we advise that you put some of the Adhesive Remover liquid on the spot, let it sit for 10 minutes and then use a Mr. Clean Magic Eraser. This can get in the pores of the finish and get most of the glue off, but please note that you may still damage the floor finish itself.
It is the responsibility of you or your installer to determine whether the glue brand you are using with our floors will suffice, and we do not require nor reject specific brands. You should be able to place a quick call to the glue manufacturer you are considering to determine whether it can be used in conjunction with hardwood and bamboo flooring.
Using a glue other than those we sell will not void your floor warranty per se, as our warranty covers our floors, not the tools or materials used to install them. If the floor fails later and the reason is that it was improperly installed or the glue failed, this should be covered by your installer's warranty or the warranty of the adhesive you purchased.
We strongly suggest only hiring installers that provide a 1-year warranty on their labor as most flooring problems arise within the first 6 months after installation, and the great majority of flooring issues are installation-related.
No, you should never add any substance (glue, silicone, etc) in between the click-lock profile/mechanism. In fact, you'll want to ensure that the click-lock profile/,mechanism is clear and free of all debris prior to clicking the planks together or else you could compromise the stability of the connection.

